| Сегодня 8 июля, среда |
|
|
|
Какой рейтинг вас больше интересует?
|
Главная /
Каталог блоговCтраница блогера PSDTUTS/Записи в блоге |
|
PSDTUTS
Голосов: 2 Адрес блога: http://psdtuts.com Добавлен: 2008-10-26 20:48:58 блограйдером DrakAngel |
|
The Preset Manager in Photoshop
2011-06-22 17:00:49 (читать в оригинале)Advertise here
Are you new to Photoshop? Have you been trying to teach yourself the basics of Photoshop but have found the amount of educational material available on the net a bit overwhelming? As the world’s #1 Photoshop site, we’ve published a lot of tutorials. So many, in fact, that we understand how overwhelming our site may be to those of you who may be brand new to Photoshop. This tutorial is part of a 25-part video series demonstrating everything you will need to know to start working in Photoshop.
Photoshop Basix, by Adobe Certified Expert and Instructor, Martin Perhiniak includes 25 short video tutorials, around 5 – 10 minutes in length that will teach you all the fundamentals of working with Photoshop. Today’s tutorial, Part 26: The Preset Manager is a bonus tutorial in this series and will explain how to use Photoshop’s preset manager to help you manage your collection of Photoshop brushes, gradients, swatches, and more. Let’s get started!
Part 1
Part 2
It’s a Bug’s Life – Inspiring Digital Art
2011-06-21 18:00:44 (читать в оригинале)Advertise here
Bugs come in all different forms. Most people use the term for pretty much all insects, and in this article we’ve handpicked some amazing digital art. These pieces have all been made by artists with great skill in many different disciplines. If you would like to take a closer look at digital art featuring bugs then please take a moment to review this article below!
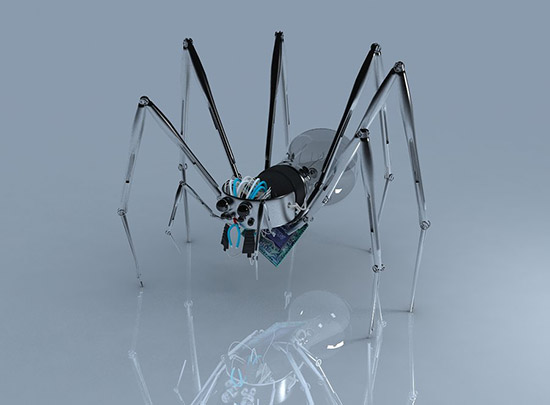
Spider by Antonio Peres
This spider has great reflections and a lot of nifty details, such as the bulb that makes the body and the motherboard. A clean and well-made bug indeed.
Cockroach by Marcos Falcao Filho
This 3D creation shows what may happen when you’re not at home. Many great details, including lights and shadows, makes this a very nice
piece of art.

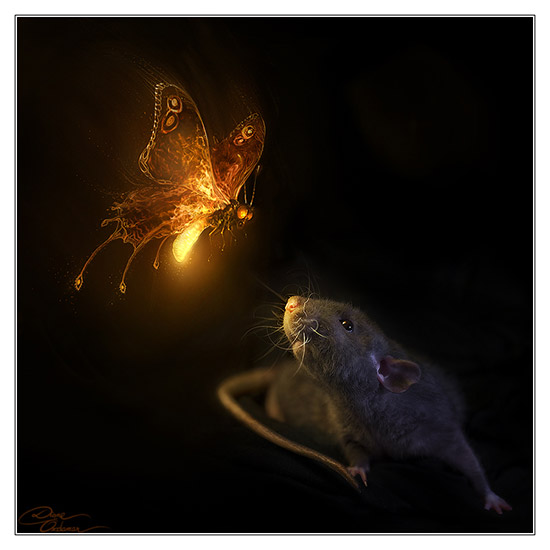
I Wish Upon a Firefly by DianePhotos
A photo-manipulation combined with some digital drawing. The mouse is shot by the artist and slightly retouched, while the glowing dragonfly is painted on a Wacom Intuos in Photoshop CS3. Nice mix of
two worlds.
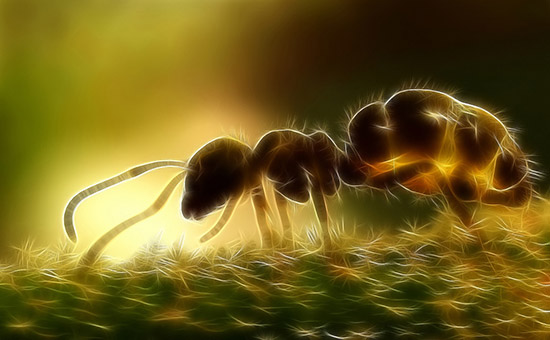
Sureallistic Ant by OrestART
The Fractalius Photoshop plugin has helped the artist create this stunning ant image in CS4. These processes don’t require many steps, but with a good base image they can surely give spectacular results.
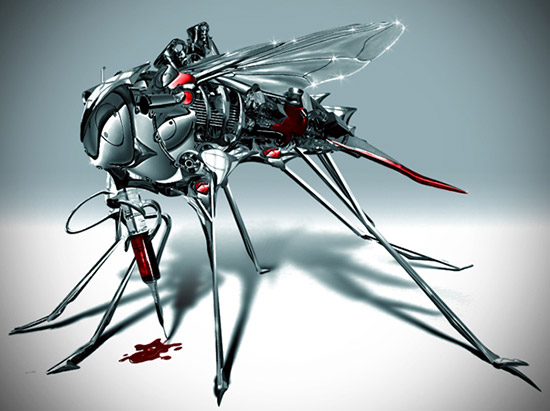
Mosquito Prototype by Catfishy93
This shiny mosquito manipulation shows good work through many details, such as the creative needle to show that it’s sucking blood and reflections on the wings.
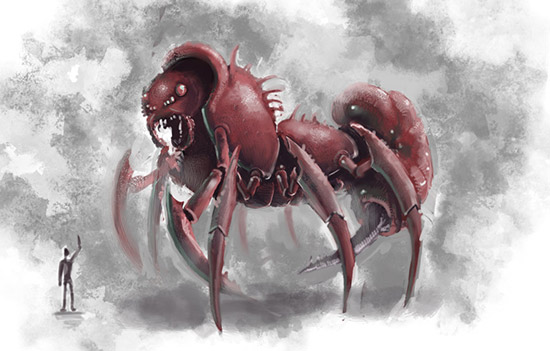
Bug by Justin Stearns
This bug concept was made for a modeling class and shows a huge bug with an intimidating facial expression. The tiny person standing in front of it makes it quite powerful and dramatic.
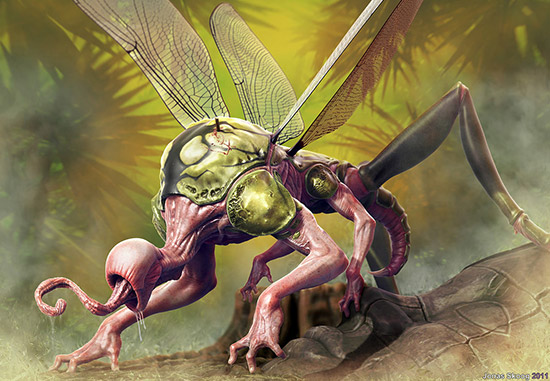
Jungle Monster by Jonas Skoog
This image was created as part of a tutorial series and featured in 3DCreative Magazine. Well-made with many great details and nice lighting and textures. The mist-like air and the jungle-style background puts it in a realistic frame.
Awakashi by Mike Corriero
Here’s a suggestion of a bug from the future. The large finned Awakashi is a large perdatory insect that is blind with sensatory organs of the side of the body. Not only does the artist have a great imagination, he can definitely draw too!
The Bug by Satthuphancung
This bug is referred to by the artist as a quick drawing but still shows good knowledge of drawing through the wasp-like body with the stinger and a powerful jaw. The blue eyes are definitely the star of the image.
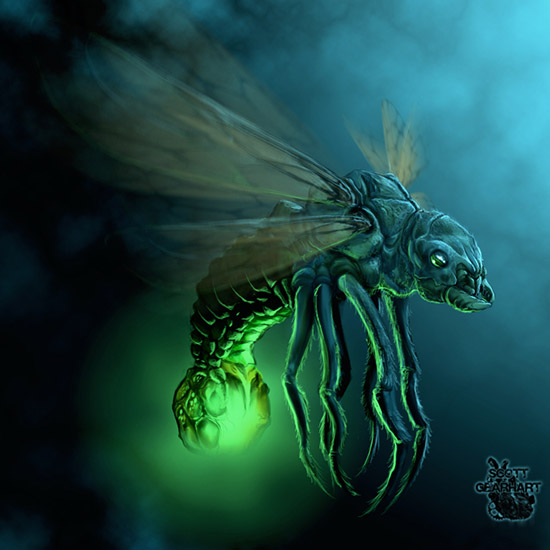
Explosive Bug by Scott Gearhart
Scott drew this bug for a Creature of the Week challenge. We don’t know how that went, but this one’s definitely a well-drawn piece. The light coming from the tail area lights up its feet in a very realistic way and the wings give a feeling of movement.
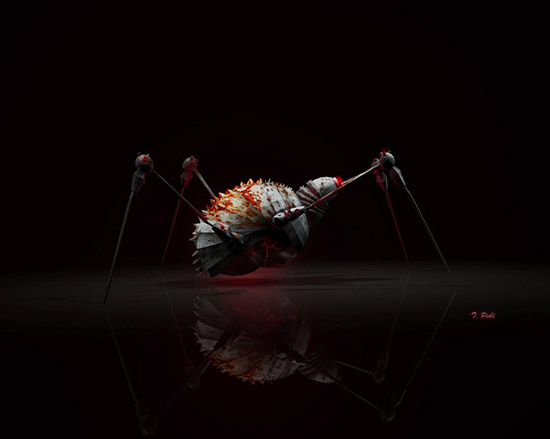
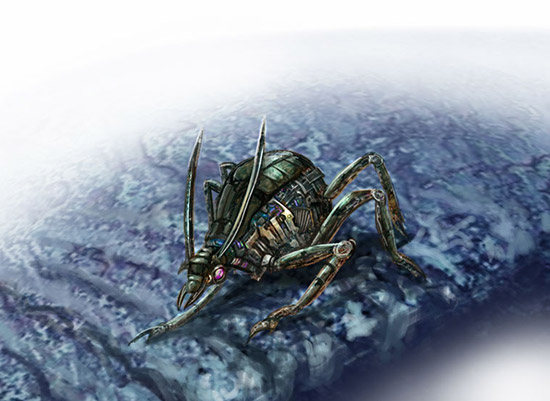
Metal Bug by OscarDaSlawter
This spider-like metal bug looks good towards the black background. It challenges your imagination by having some distance. The red glow is a nice touch along with the rust on the back.
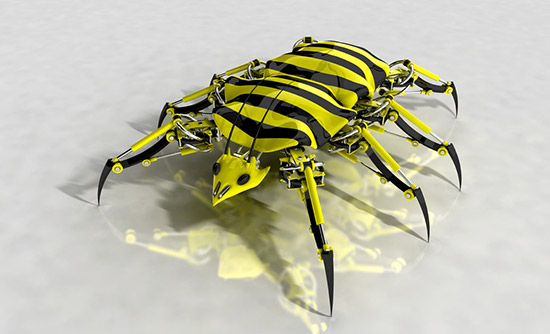
Bug – Framed by Capnhack
This mechanical bug was modeled and rendered in Cinema4D. Many good details, such as lighting, shadows, reflections and the construction of the feet makes this stand out as a very nice image.
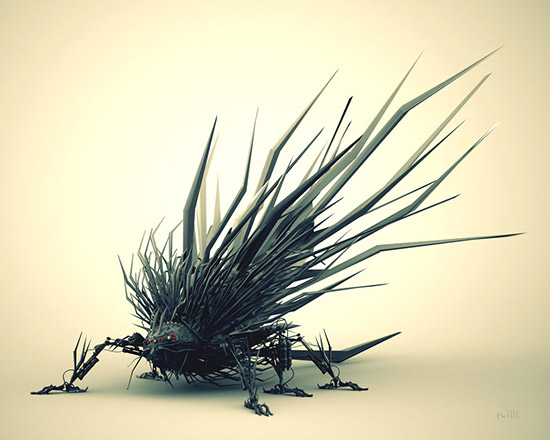
Diablid by Matt Mills
Mills modeled this creature in Maya and rendered it using Maxwell Render. It’s a very detailed model that is creepy and reminds us of a cute hedgehog at the same time.
Little Bug by Goran Delic
This little, digitally painted, futuristic bug on its cold blue background has quite a few good details when you take a closer look.
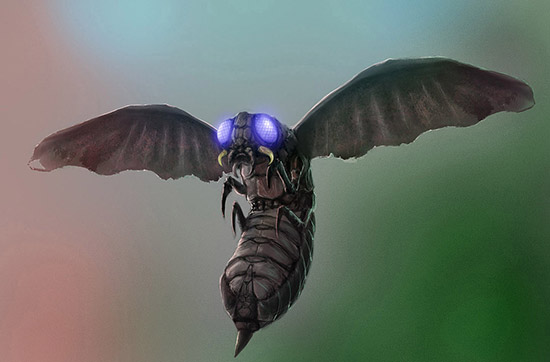
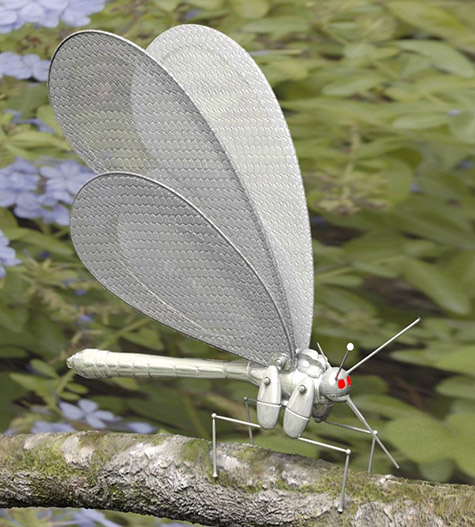
Robot Butterfly by Brett Anderson
This robotic butterfly with some similarities to a dragonfly was modelled and rendered in Modo. The bright grey body gives a clean futuristic look, while the glowing red eyes stand out as quite mystic.
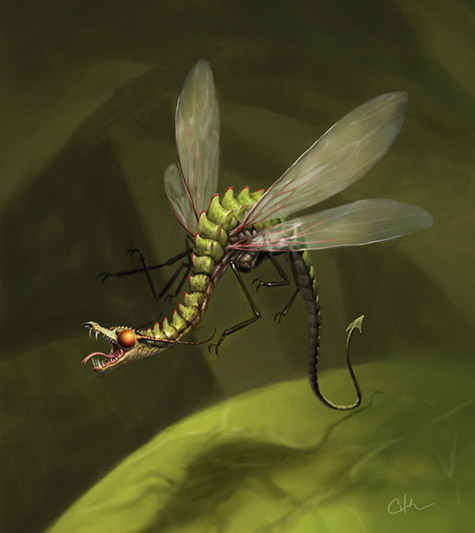
Dragonfly by Imaginism Studios
This type of dragonfly was seen flying around in the beginning of the Alice In Wonderland movie. The head of a dragon makes a funny twist and it’s detailed and has a nice mood to it with the shadow and green background.
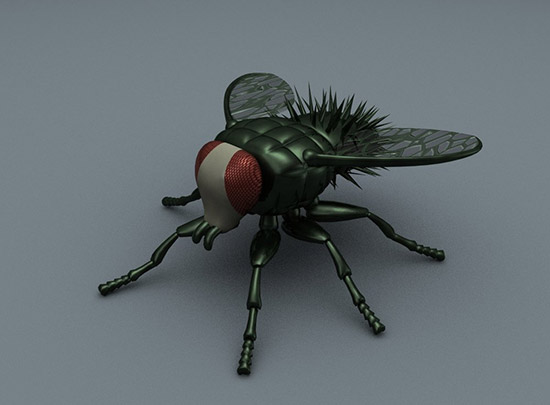
Fly by Greg Medendorp
This fly has a plastic look, almost as if it was a toy. It was originally created for a video-production class as part of a commercial for bug-ball. Ever imagined playing tennis with huge bugs? That’s what bug ball is all about!
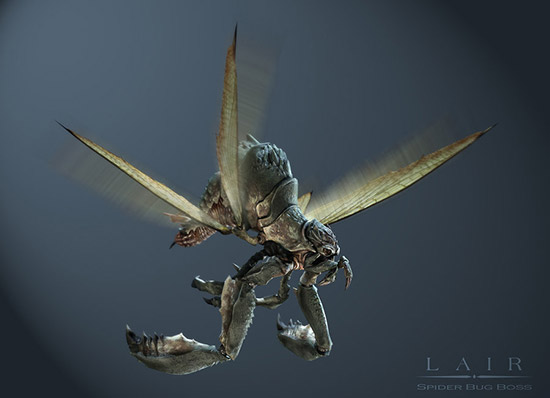
Spider Bug Boss by Alessandro Briglia
This is one of the final bosses in the video-game Lair. The blur of the wings give a sense of motion and it all has a solid realistic look.
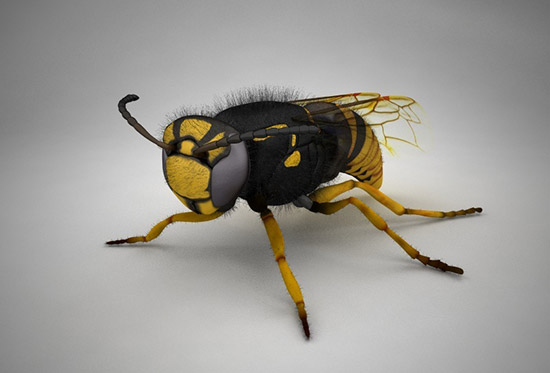
Wasp Front by Paul Blackham
Paul Blackham spent about a week with modeling, uv, paint and pose for this wasp. It won him a 2ndplace in a competition. He surely got many nice details in there, from the hairs on the body to the transparent wings.
The Chilling Ant by Harald Oesterle
Ever wondered what ants do when they have their day off? This funny chilling ant illustration has nice colors and nifty details. The use of light and shadows gives a feeling of sunset.

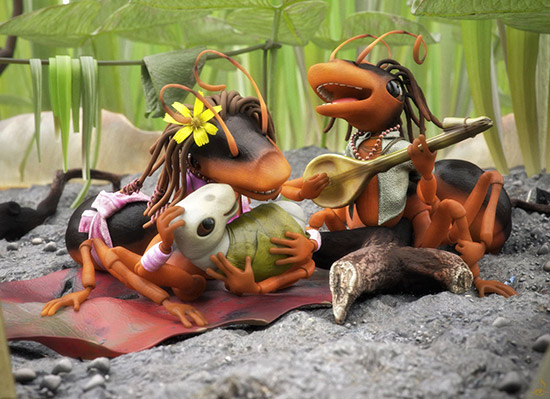
Hippie Ants by John Strieder
With the use of Zbrush, C4D and Fryrender, John Strieder has made a funny 3D piece of some hippie ants.
ANT-ology by Martin de Diego Sábada
This illustration has nice colors and good lighting/shadows. It’s a humorous illustration that shows skill and creativity.
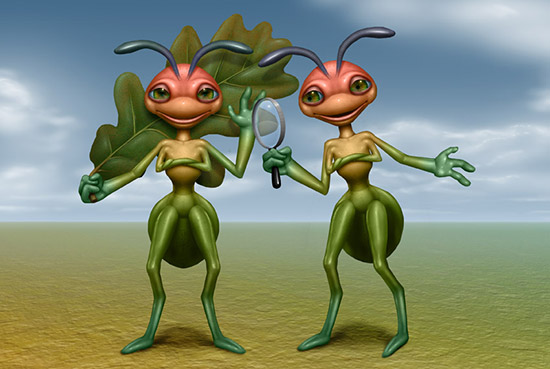
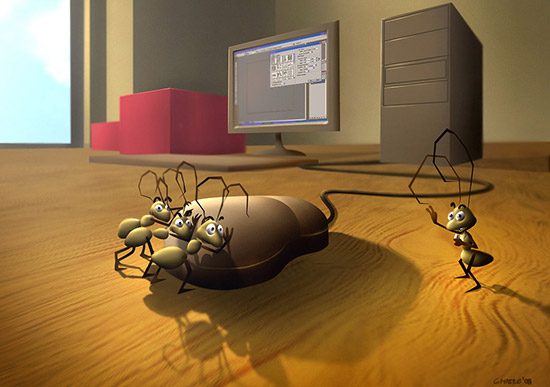
Ant by Gauntle
Ants are definitely popular to draw, and with these guys we’re getting a funny clean illustration with great light/shadow. It actually looks as if they’re Photoshopping!
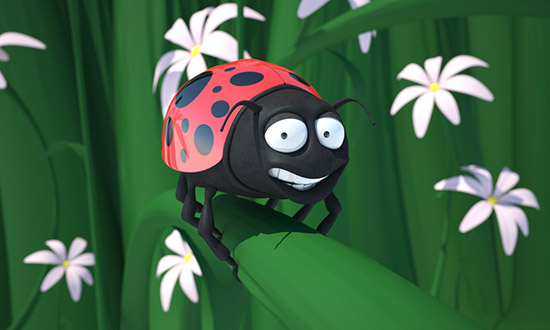
Little Andy by Matt Mills
This ladybug has been modelled in Maya and rendered with Maxwell Render. Notice especially the use of light and shadows, along with the colors.
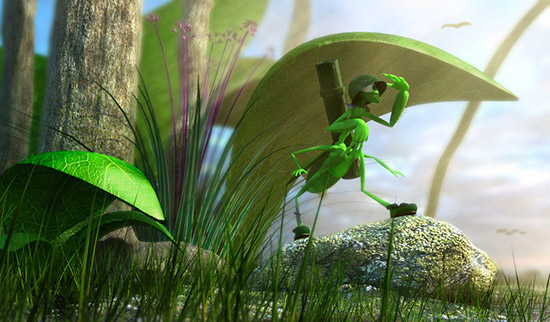
The Lonely Armybug by ScorpeS
This one was made for a school assignment as far back as in 2004. The lonely bug (a praying mantis) thinks he’s a hero. Nice lighting and vibrant colors make this one a very nice piece of work.
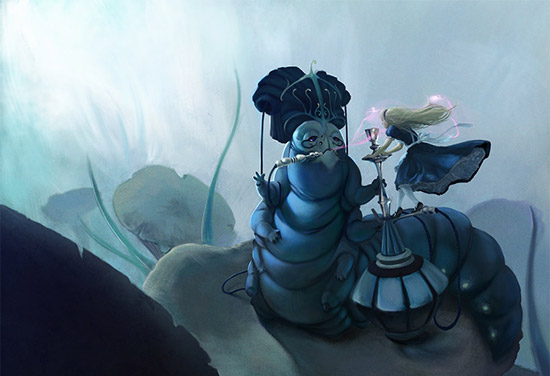
Listen to Me, Alice by Raoxcrew
This piece won a contest. Alice in Wonderland has influenced and inspired many digital artists, especially after the Tim Burton version came out recently. We especially like the blue ambient colors and the shadows.
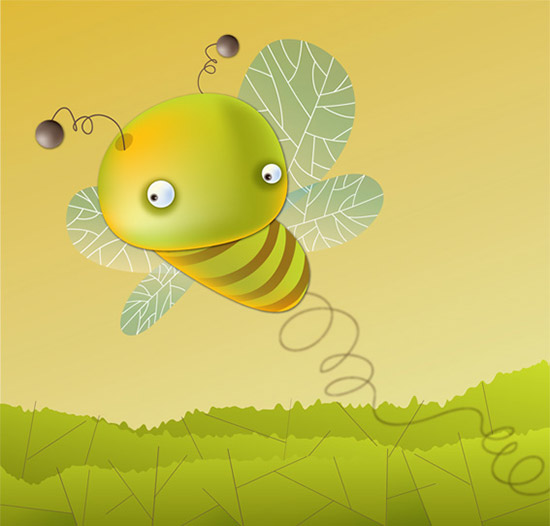
To Bee or Not to Bee by Arghavan Khosravi
This vector-bee was drawn in Adobe Illustrator 2. It has a cartoon-like look and a nice and subtle color scheme. The shadowing and the 3D look of the feelers almost makes it pop out of the screen.
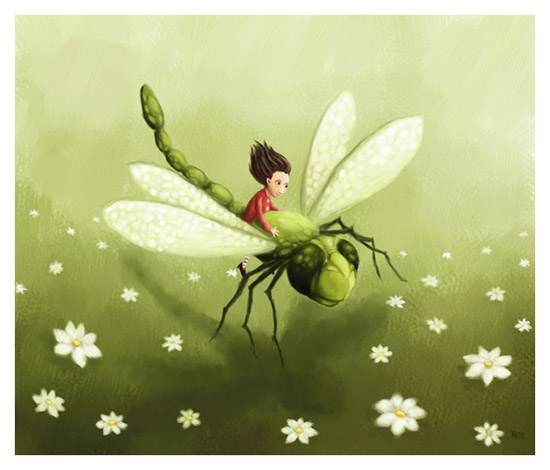
Sudenkorento by Pete Revonkorpi
This boy that flies through a field on a dragonfly is surrounded by a nice color scheme and even has the wind in his hair. It has a calm look and a strong personal fairytale-like style.
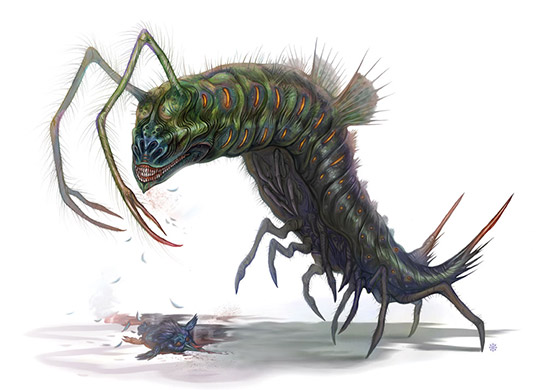
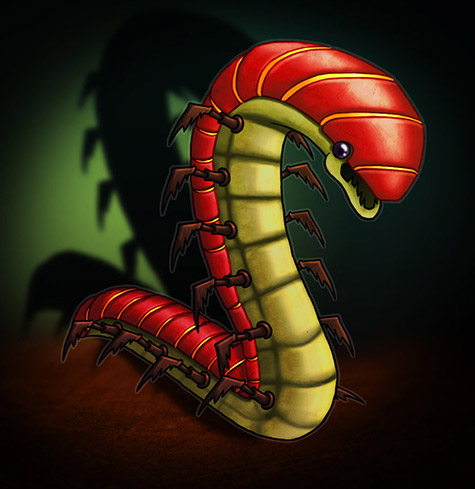
Centipede by Steve Rae
This centipede has some nice vivid colors and stands out really well from the darker background. Nice lighting and shadows too.
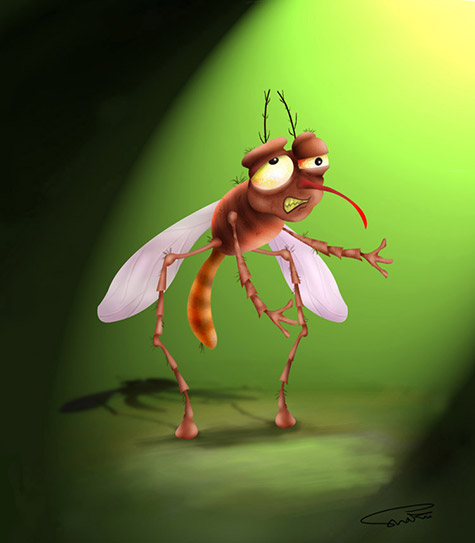
Mosquito by Shakil Awan
This poor mosquito is caught in the limelight and seems uncomfortable. The artist has made a true character out of this one, with good lighting and great expressions.
Do you like bugs?
We hope you’ve been amazed and inspired by some of these artworks. Bugs in general may not be the favorite animals for most of us, but these artworks are definitely up to the challenge. We’d love to hear which piece is your favorite and why. Feel free to share links to your own bugs with us in the comments.
Win a Free Copy of Filter Forge (x3)
2011-06-20 19:30:15 (читать в оригинале)Advertise here
When most people open Photoshop for the first time, one of the first features they tend to use are filters. Filters are a powerful way to make edits to your photos and images but let’s be honest; some of the default filters in Photoshop can be a bit cheesy. The great thing about Photoshop however is that it allows you to install and use excellent third party plugins and filters. Today, we are partnering with Filter Forge to give away 3 copies of Filter Forge Basic Edition.
Filter Forge is a versatile Photoshop plugin which allows both novice and expert users create a wide variety of realistic and abstract textures and effects. Users can take instant advantage of over 8100 free community-created filters in the online filter library, or create their own filters in the visual filter editor by assembling them from components such as blurs, gradients, color adjustments, noises, distortions, or blends – without writing a single line of code.
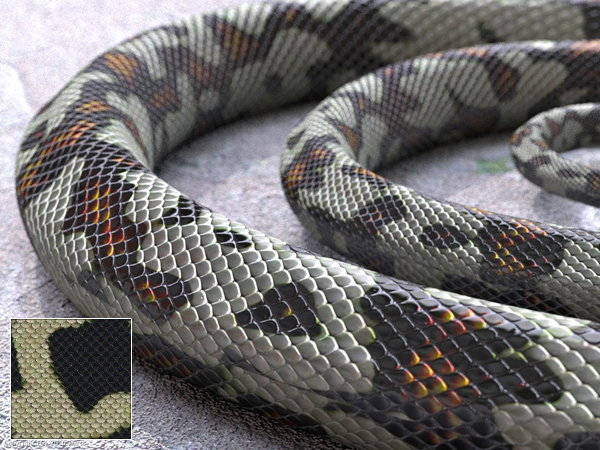
In this image Filter Forge was used to create the snakeskin: Pattern maps, bumpmaps, and normal maps. The 3D model was made in Microstation V8i, rendered with Luxology Render. No post work.
See More Examples
On the surface, Filter Forge is just a Photoshop plugin, a pack of filters that generate textures, create visual effects, enhance photos, and process images. However, there are some things that make Filter Forge unique:
- You can create your own filters. Filter Forge comes with a visual node-based editor allowing you to create your own filters – textures, effects, distortions, backgrounds, frames, you name it. All filters automatically support 16- and 32-bit modes in Photoshop, real-world HDRI lighting, bump and normal maps, huge resolutions, and most filters can be seamlessly tiled.
- You get free access to over 8100 user-created filters. Anyone can contribute their textures and effects to the online filter collection so it grows with every submitted filter. This means the more people use Filter Forge, the better it gets.
To win a free copy of Filter Forge, all you need to do is leave a comment below and tell us how you would like to use this plugin.
Up For Grabs
- 1 copy of Filter Forge Basic to 3 readers
Rules
- To enter, leave a comment below and tell us what you would do with your copy of Filter Forge
- You may only enter once.
- Make sure to enter a valid email address so that we can contact you.
- Entries will be accepted until Friday, June 24, 2011 at 11:59 PM, EST.
To learn more about Filter Forge, visit their website, download the demo version of the software, and check out their gallery.
Download Demo
Editor’s note: This post was sponsored by Filter Forge.
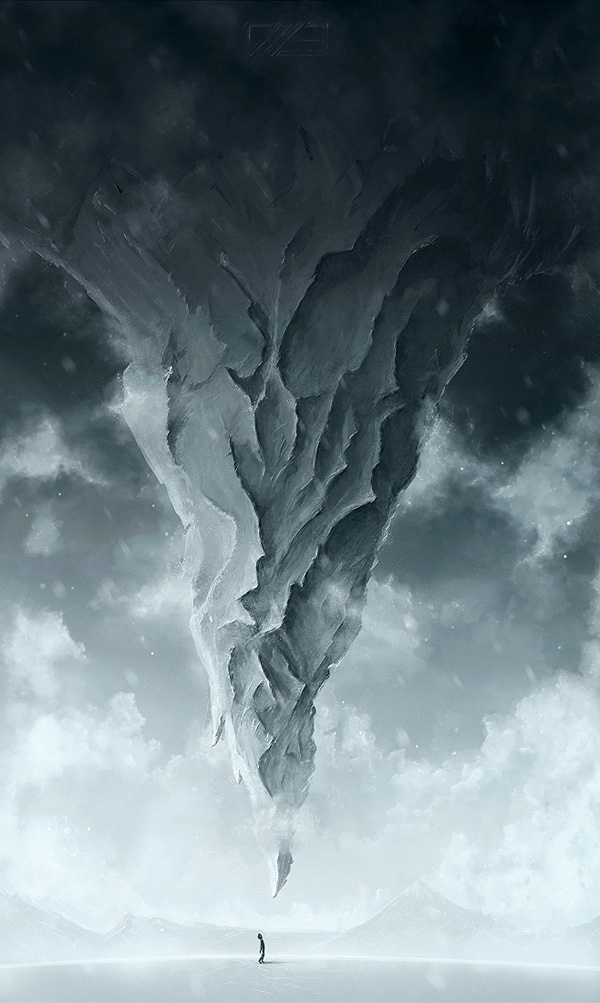
Create a Surreal Upside Down Mountain Painting in Photoshop
2011-06-20 17:00:42 (читать в оригинале)Advertise here
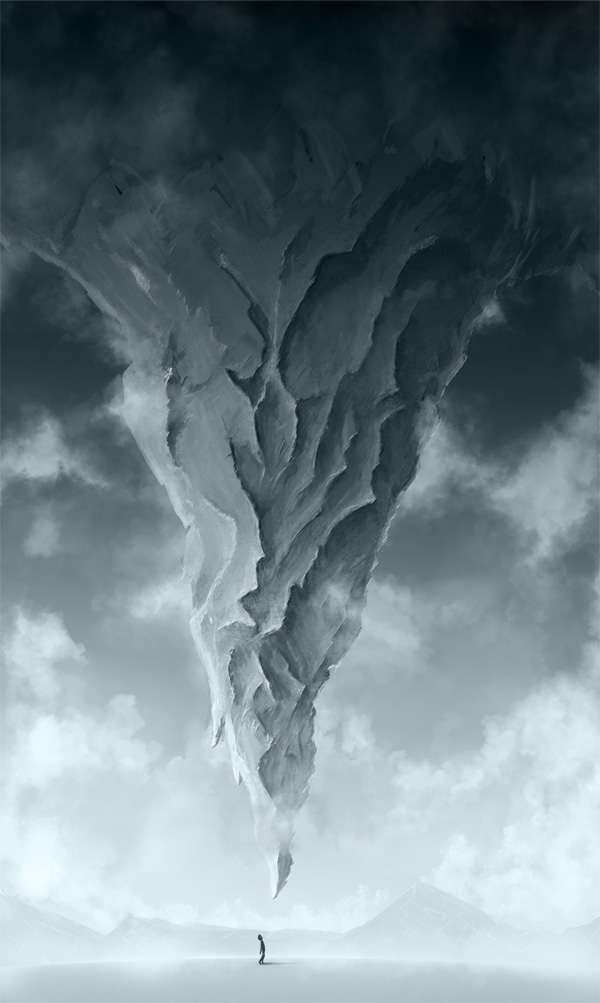
In this tutorial we will demonstrate how to create a surreal upside down mountain illustration using digital painting techniques in Photoshop. This piece was part of SlashThree’s latest Paradigm Shift Exhibition.
Tutorial Assets
The following assets were used during the production of this tutorial.
- Brushes
Before You Begin
This piece has been completely done with the help of a graphic tablet, to be precise a Wacom Bamboo Fun. Since I know that some of you don’t have one, I’ll try to explain during the whole tutorial, when it’s needed, how to achieve the same results using a mouse (and a lot of patience).
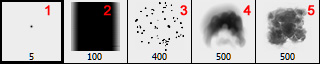
Brushes Used
These are the brushes used in this tutorial. The first two are standard brushes. The others can be downloaded above.
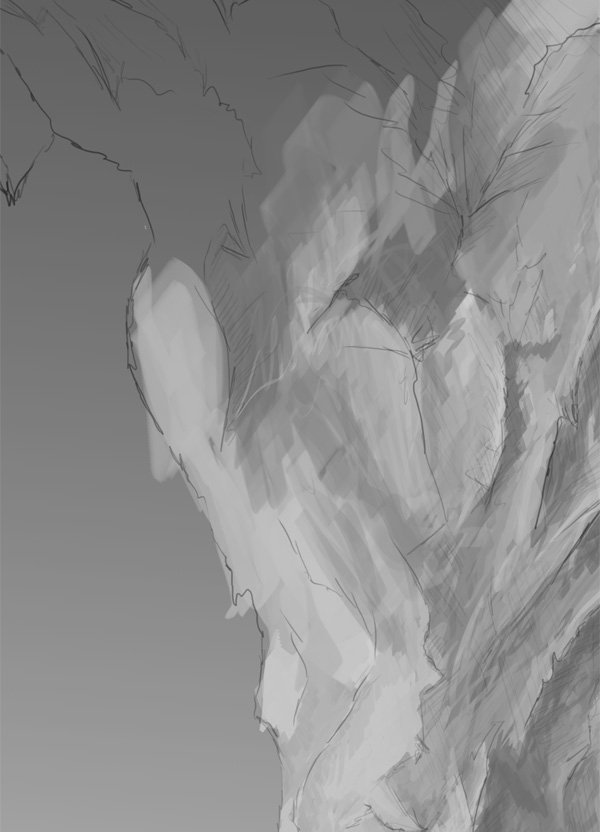
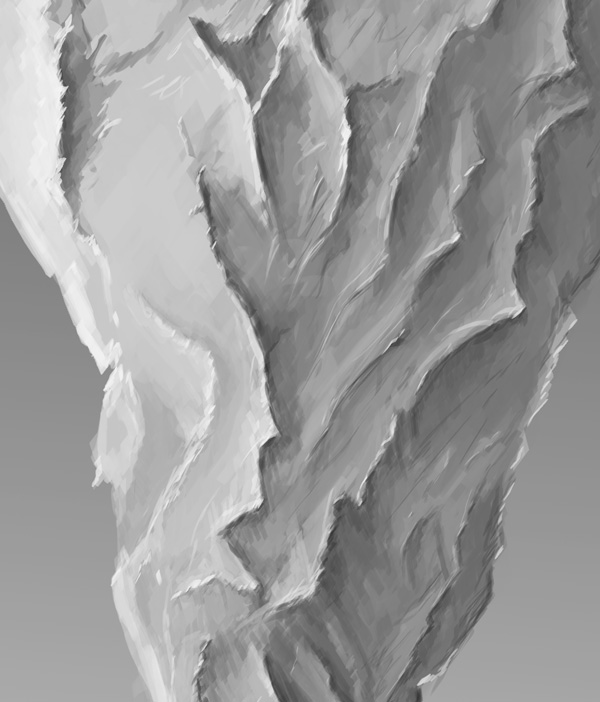
Step 1 – The Sketch
This sketch was made directly in Photoshop using a tablet and a small round brush. If you don’t own a tablet and want a sketch like this, just do it on paper. You can always use a scanner and then import it on Photoshop.
You don’t have to be the best artist in the world to do this. It’s a mountain; it’s made of rock. Rocks are not perfectly shaped!
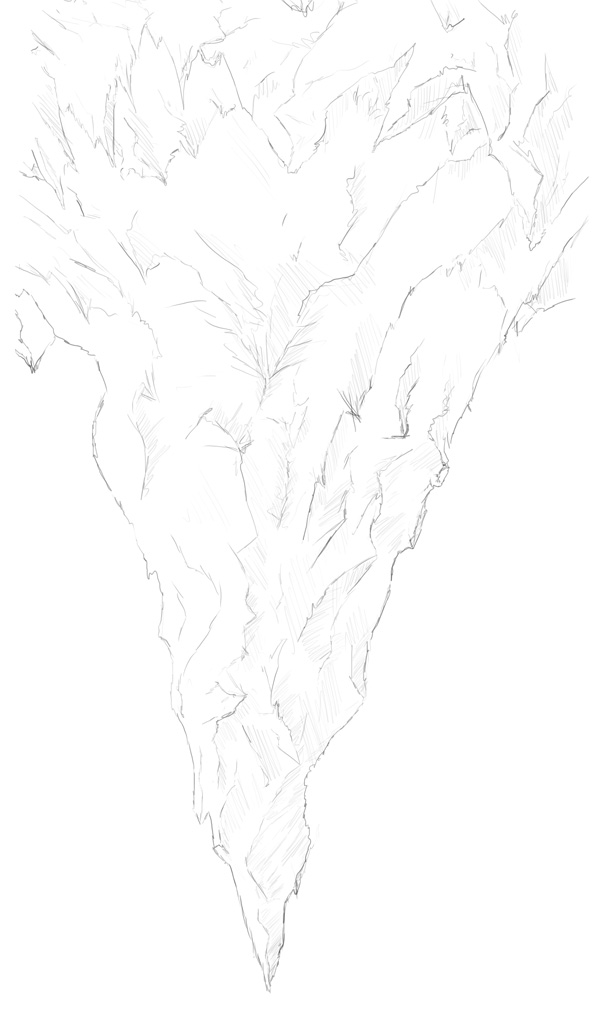
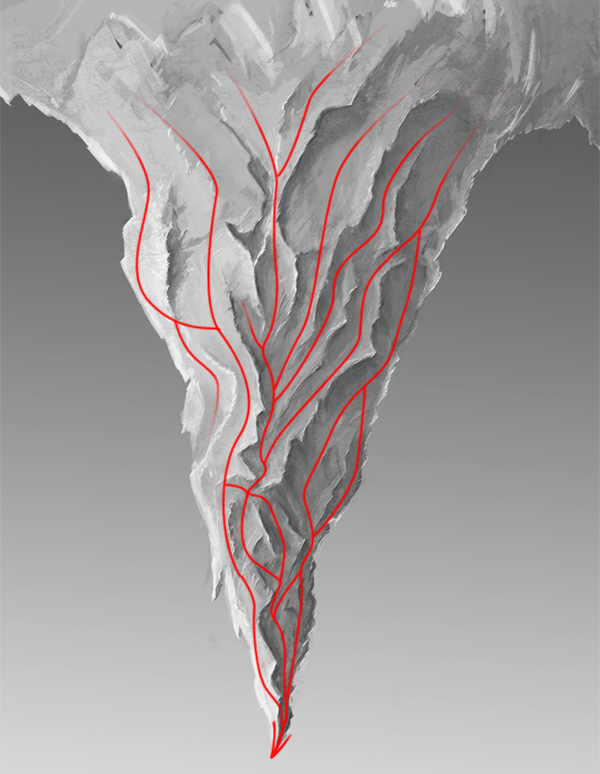
I made this piece by thinking about how I could make a mountain that could work as the focus of the piece. I drew a lot of sharp cliffs, I tried to make them interesting to the eye. I also made a lot of small "paths" starting from the top of the piece and leading to the bottom, at the tip of the mountain. This was made in order to give to the viewer’s brain something to follow. If you’re occidental, you read from left to right; if you’re oriental, from right to left; but everyone reads starting from the top. This is the key: our eyes will start looking at our piece, even if it’s only for a tenth of a second, from the top. When they (our eyes) do this, they will be looking for a road, which is, for our brain, a logical connection to something. So our brain starts following those roads, they’re a lot, but whatever road the brain chose, it will eventually lead to only one point. That point is where I wanted to have the full attention of the viewer, where he or she had to focus the most.
This will be more obvious once the painting is completed, in step number 2.
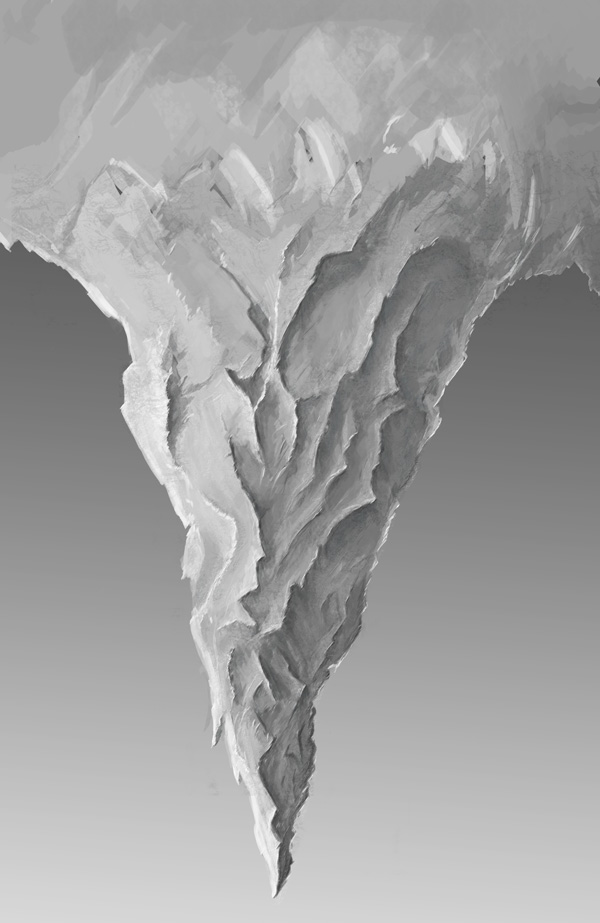
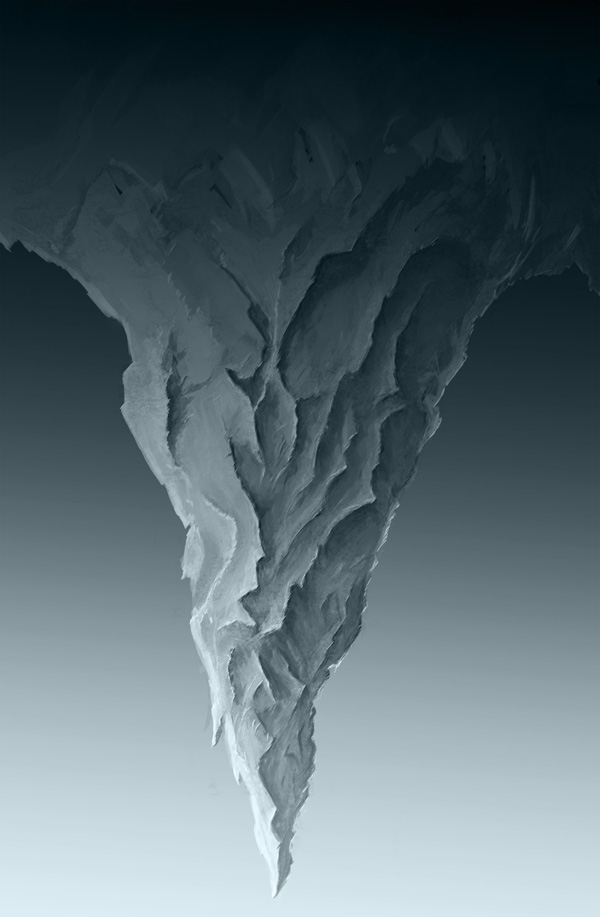
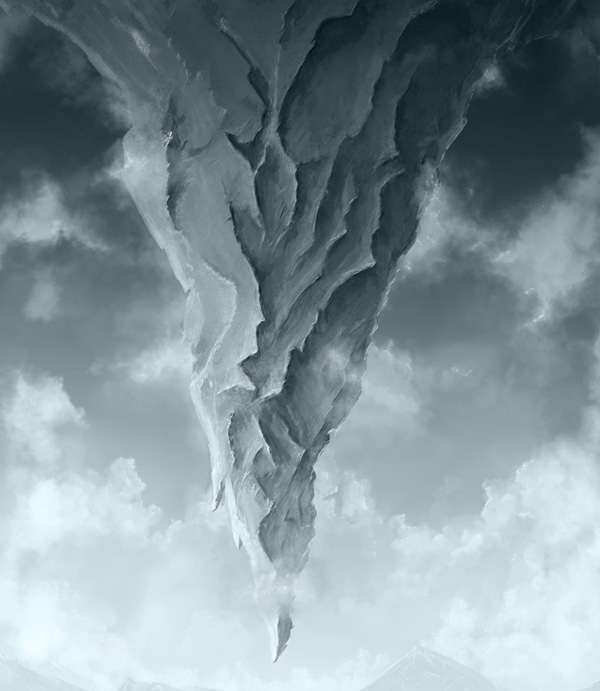
Step 2 – The Mountain
Sketch is done, we’ve put some thought into it, let’s start painting. I decided to start this in black and white, colors were added later. It helped me focus only on the painting action, without worrying too much about other things.
I made a new layer and moved it under the sketch layer so I’m able to see the sketch while I’m painting. If you’ve sketched over a white layer (or a piece of paper) just set the layer on Darken or Multiply.
Using the Brush tool (B) and the brush number 2 I started painting the mountain. I used a light gray for the light areas and a dark gray for the shaded areas.
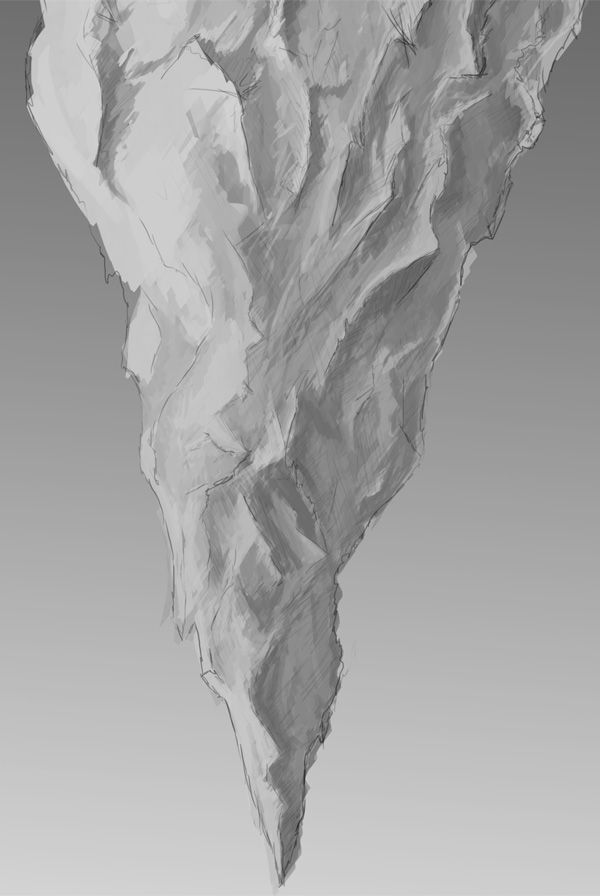
Don’t spend too much on details, they will be added later. At the moment just try to block the shapes, decide where’ll be shadows and where there’ll be light.
Now you can start to add some contrast and value to the cliffs. Using a lighter gray I made the highlights, and with a darker gray, almost black, the shadows.
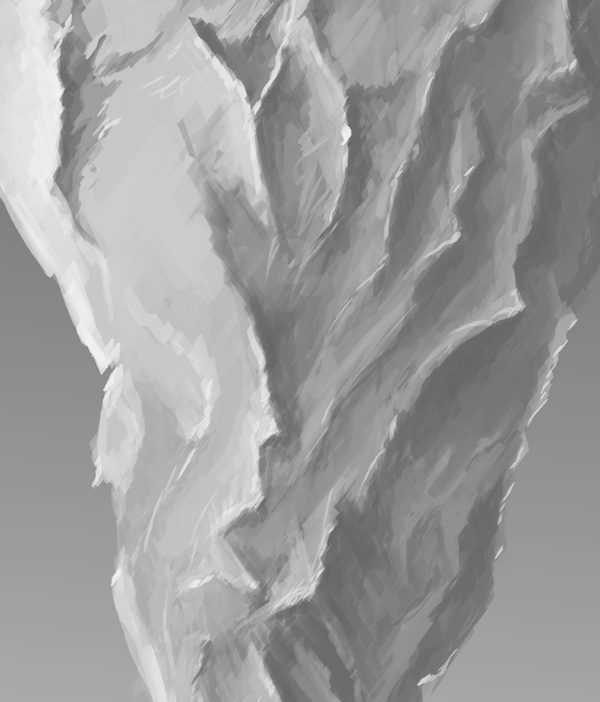
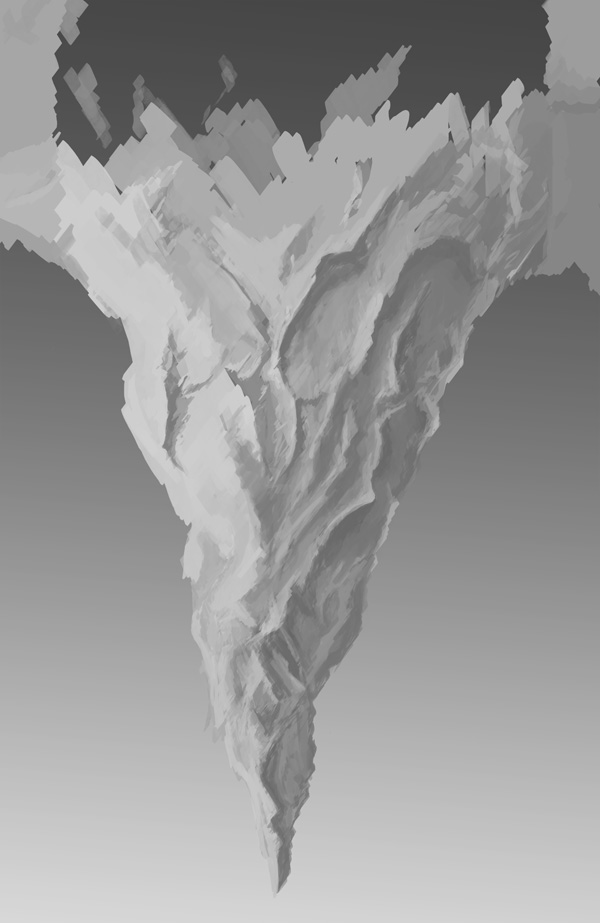
Using the same brush I painted the bottom of the mountain and started painting details. I also added some textures at low opacity to add further details. Just have fun in this step: I love adding small details. Take your time, don’t rush it. If you feel that a tiny brush stroke is needed, do it. Even though it’s been two hours since you started adding those tiny brush strokes.
Remember when I talked about the paths? This is what I meant:
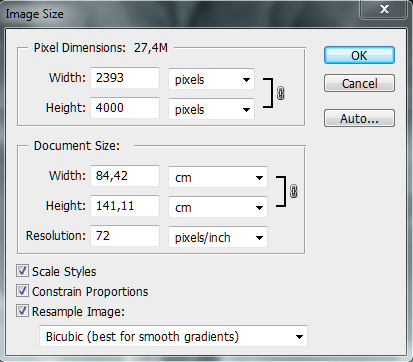
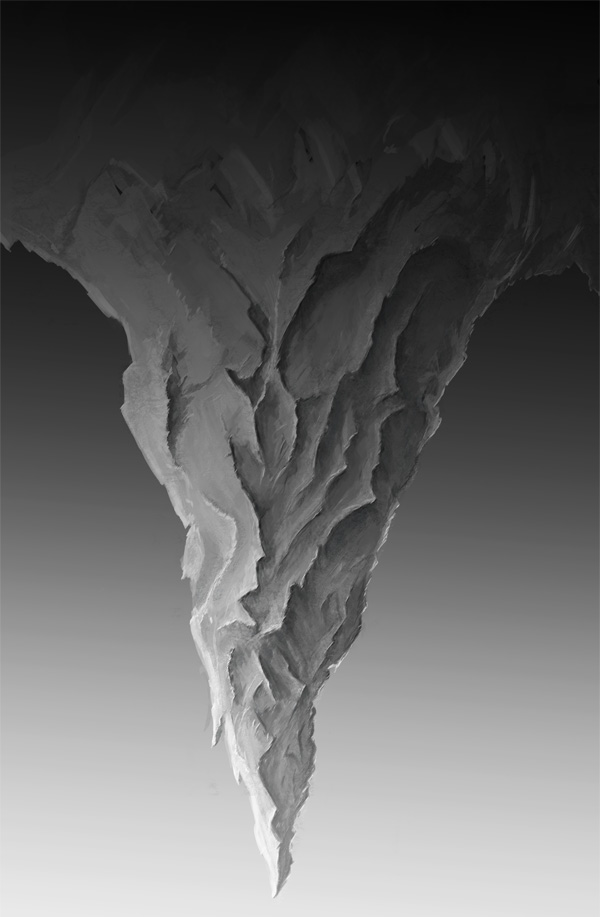
Step 3 – Upside-down
Atmosphere in this piece, so far, works like this: the tip of the mountain is darker, the top of the piece\bottom of the mountain, however, is lighter. That’s because atmosphere, from our point of view, is more affective in the sky than on the ground. But the piece is called Upside Down, right?
Using a black and white linear gradient (G) set on Hard Light, I reversed the effects of the atmosphere. The reason is simple: I wanted that, when you’re looking at it, you wonder if it’s correctly orientated, if, maybe, you actually need to turn it upside-down to see how it actually is, because it might be that’s not the mountain that isn’t in the right place.
Now using the Paint Bucket Tool (G) I filled a layer with a cyan color, #cedee4 to be precise. Then, I set it to Color.
Step 4 – The Ground
Using the Pen Tool (P) I created the shape of the ground. To remove the flatness of the layer, I used a Gradient (G) (#95a5ab to #b9c9cf) and a Clipping Mask (right click on the layer > Create clipping Mask).

Using another Clipping Mask, I painted over the ground with the brush number 5 some mist.

The curious stick man down here has been made using brush Number 1. I added some details to him, but actually they were all completely unnecessary, since they’re so small that when the piece is resized they disappear. Don’t waste time on them as I did.
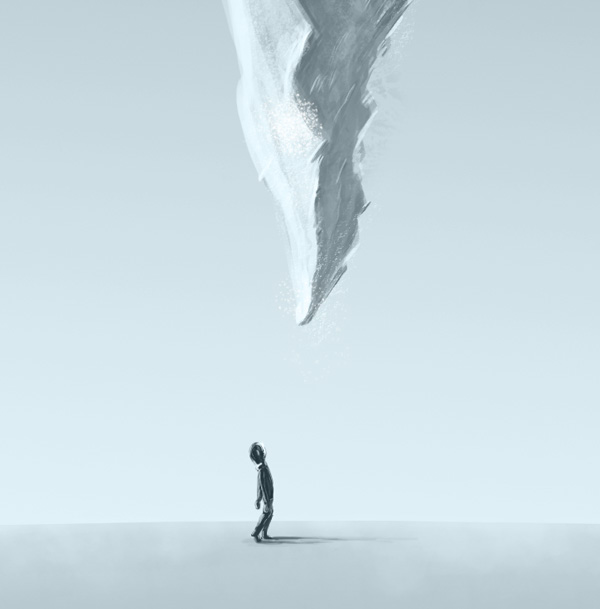
Using brush number 2, I painted some far mountains. Keep them simple, if you want to add some details just add some light cyan, almost white, to the tips of the mountains, for the snow.

Step 5 – The Clouds
The technique I used for the clouds is very simple, but still very nice. You need to alternate continuously the Brush tool (B) and the Eraser tool (E), always using brush number 5 for painting and number 5 or 4 for erasing. If you’re using a mouse, remember to vary the opacity!

Paint the clouds using a light cyan and then, with the Eraser tool, erase the undesired areas. In this painting I made two different kinds of clouds, as you can see from the image below. The technique is the same, the only thing that change from the top clouds and the bottom ones is the brush I used to erase, which is number 4 for the clouds at the bottom.
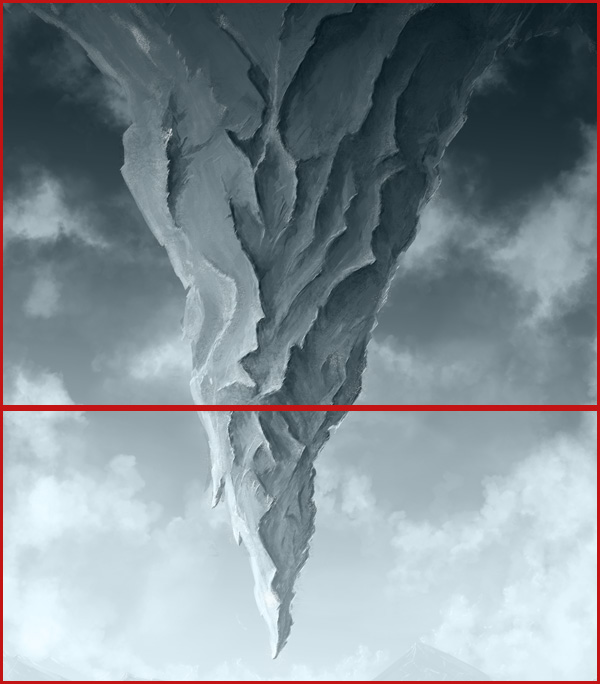
Using the same brushes I painted some clouds over the mountain.
Using brush number 1 I added some details to the “edges” of the clouds.
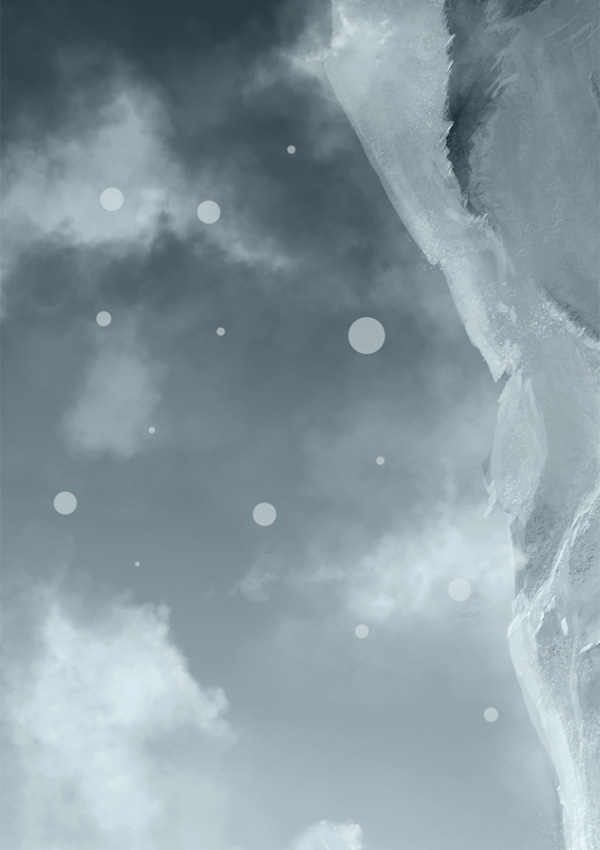
Step 6 – The Snow
Using a hard round brush (number 1) at a variable diameter (10 to 40) I made these "balls" all over the piece.
For making the snow look like it was falling, I used the Motion Blur Filter (Filter > Blur > Motion Blur…).

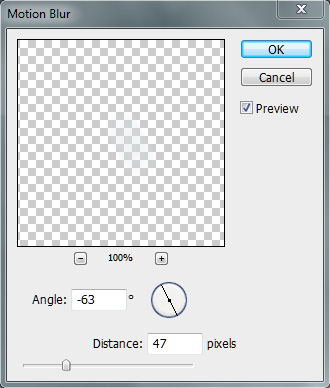
Erase the snowflakes you don’t like and make new ones if you feel that in some places are missing. I also lowered the opacity of the layer to 63%.

Final Image
The AppStorm Freelance Mac App Bundle is on Sale (10 Days Only)
2011-06-20 06:15:37 (читать в оригинале)Advertise here
Every freelancer knows that a good tool can make a dramatic difference in productivity. And for freelancers productivity = earnings. That’s why I’m super excited to announce that the first ever AppStorm Freelance Mac App Bundle is now on sale and it’s packed full of Mac Apps, files and eBooks that is unbeatable value for freelancers!
Which Apps Are Included?

We’re featuring eight awesome applications that can make your life easier, and more enjoyable, as a freelancer. These are:
- Billings – Powerful time billing and invoicing for anyone (Usually $39.99)
- TextExpander – Save time and keystrokes with frequently used “snippet” abbreviations (Usually $34.95)
- WriteRoom – The best distraction-free writing environment (Usually $24.99)
- Radium – The easiest way to listen to internet radio on Mac (Usually $9.99)
- Arq – Online backup built especially for the Mac (Usually $29)
- LittleSnapper – Build up your own versatile design scrapbook (Usually $29)
- 1Password – Have you ever forgotten a password? Never again (Usually $39.99)
- Alarms – Prioritise and track your daily tasks (Usually $16.80)
Each of these is a piece of software that our AppStorm team wouldn’t hesitate to recommend, and every single one would be a great addition to a freelancer’s arsenal of apps. This week is your chance to get your hands on the whole package for a ridiculously low price!
But That’s Not All!
 In addition to the above apps, we’re also throwing in a few fantastic Envato marketplace items that can help spruce up your personal website, manage clients more effectively, and craft a funky business card to promote yourself:
- Highlight WordPress Theme (Usually $35)
- Ultimate Client Manager (Usually $20)
- Translucent Business Card Template (Usually $6)
- Rockstar Freelancer eBook (Usually $29)

One More Thing…
Finally, we’re excited to let you know that anyone can grab a free copy of Smashing Magazine’s Successful Freelancing eBook, worth $9.95, just for sending out a tweet about the bundle! Head over to the bundle page to find out more, and grab your free eBook.
Don’t Miss Out! Grab the Bundle Today
This awesome offer will only be available for just over a week, so don’t miss your chance to bag your collection of fantastic apps and resources!


|
| ||
|
+1561 |
1596 |
fiona |
|
+1550 |
1597 |
Алексей Чернов |
|
+1529 |
1559 |
Elen_i_rebyata |
|
+1513 |
1584 |
Малти_Ошер |
|
+1512 |
1589 |
Дрочливый_Драчун |
|
| ||
|
-2 |
74 |
Рыжая_Лада |
|
-2 |
1264 |
Сайт визажиста Мокровой Инны блог |
|
-2 |
947 |
G-Traveler | Сайт заметок путешественника |
|
-5 |
53 |
BJohn |
|
-6 |
17 |
Аццкей_Сотона |
Загрузка...
взяты из открытых общедоступных источников и являются собственностью их авторов.