| Сегодня 8 июля, среда |
|
|
|
Какой рейтинг вас больше интересует?
|
Главная /
Каталог блоговCтраница блогера PSDTUTS/Записи в блоге |
|
PSDTUTS
Голосов: 2 Адрес блога: http://psdtuts.com Добавлен: 2008-10-26 20:48:58 блограйдером DrakAngel |
|
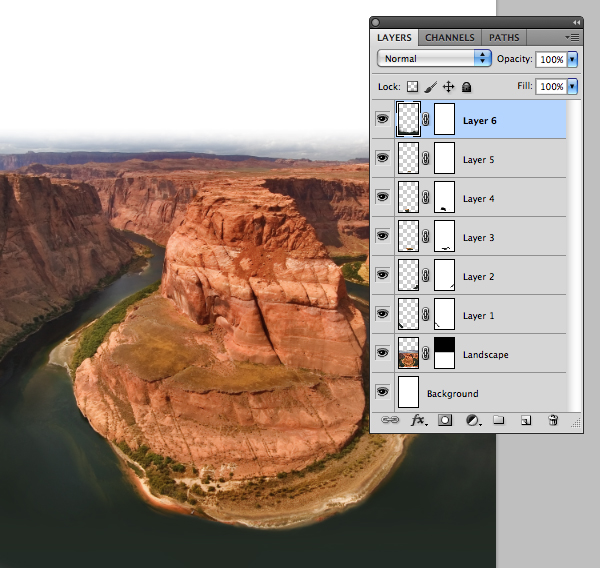
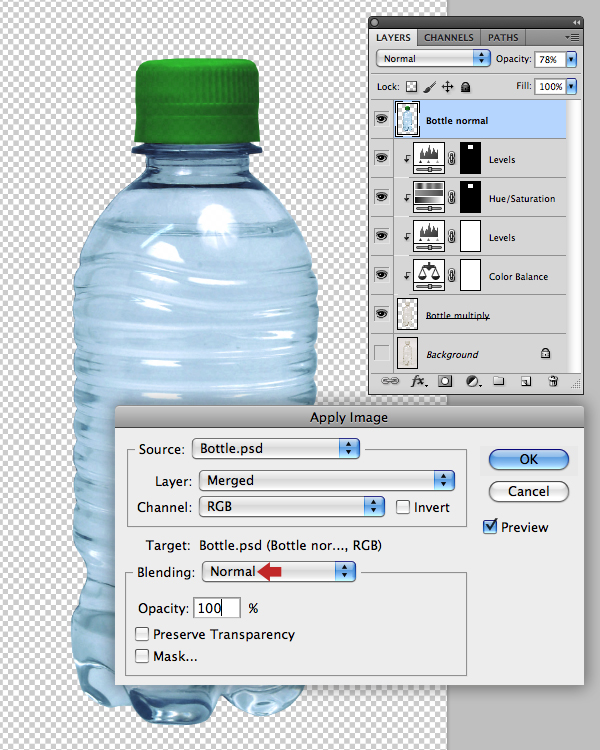
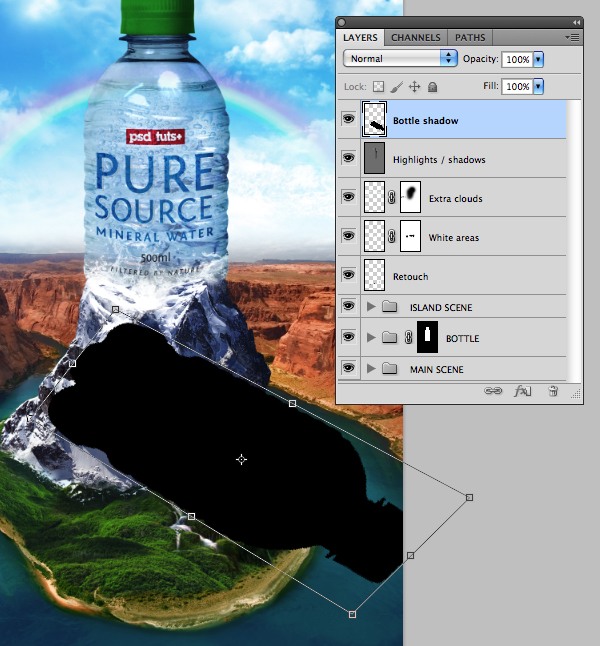
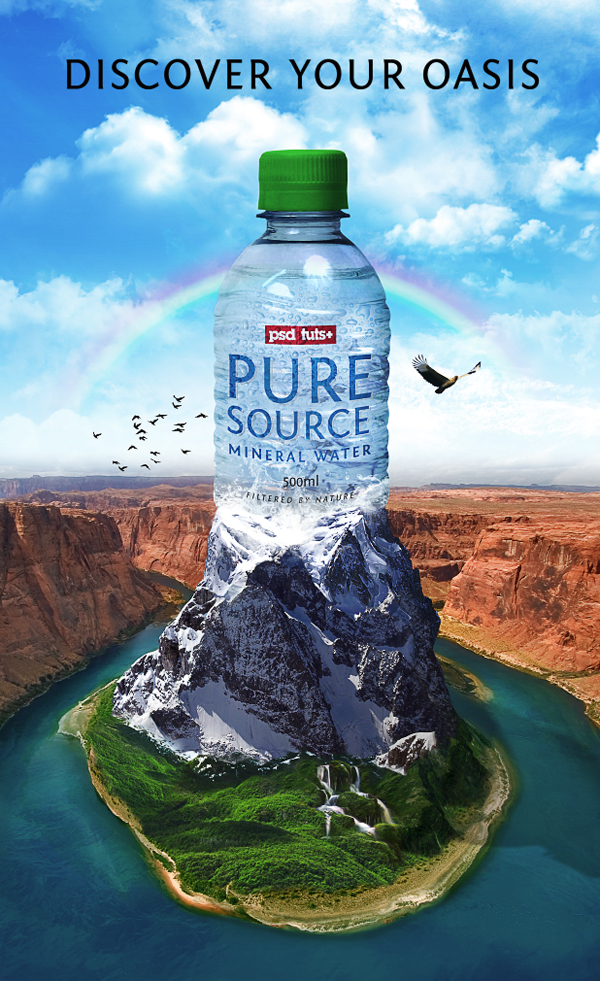
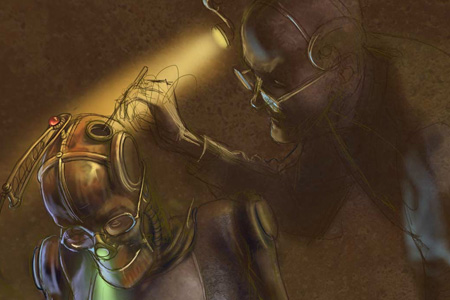
Create a Surreal Advertising Photo Manipulation – Psd Premium Tutorial
2011-07-28 17:00:53 (читать в оригинале)This Psd Premium tutorial by author Mark Mayers will take inspiration from the surrealist art movement and will demonstrate how to blend stock images to create an illustration that could be applied to anything from drinks machines to point-of-sale displays. Observing how light reacts in the real-world is a key factor when combing multiple photographs – all of which have different degrees of light, shadow and color. To pull off this effect, we’ll make extensive use of Adjustment Layers as well as some advanced masking techniques. This tutorial is available exclusively to Premium Members. If you are looking to take your print and t-shirt design skills to the next level then Log in or Join Now to get started!
About the Author
Author Mark Mayers is a talented designer and illustrator from the UK. He has worked as a designer and creative director for several design/advertising agencies and specializes in print, branding, packaging, and exhibition graphics. Mark began his career when the tools of the trade were markers, layout pads, and most importantly, the ability to draw, but he embraced the digital revolution in the early 90′s and swapped his drawing board for a Mac. Today, Mark freelances from his studio in Cornwall for such clients as American Express, BMW, Future Publishing, IDG Communications and Imagine Publishing.
Professional and Detailed Instructions Inside
Premium members can Log in and Download! Otherwise, Join Now! Below are some sample images from this tutorial.
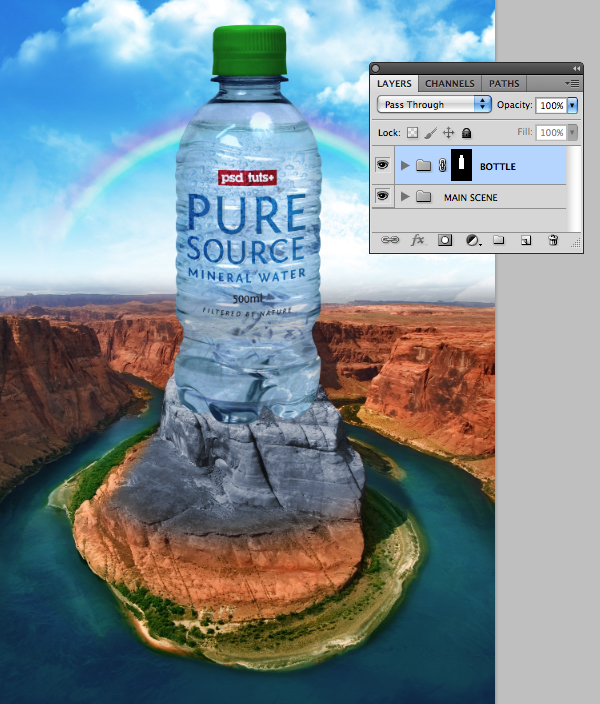
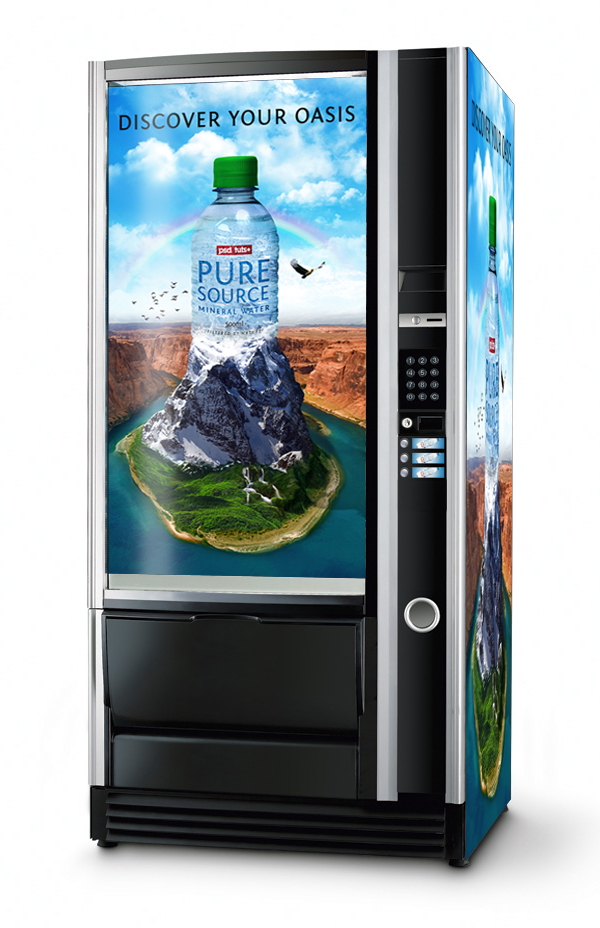
Final Image
Psd Premium Membership
As you know, we run a premium membership system here that costs $9 a month (or $22 for 3 months!) which gives members access to the Source files for tutorials as well as periodic extra tutorials, like this one! You’ll also get access to Net Premium and Vector Premium, too. If you’re a Premium member, you can Log in and Download the Tutorial. If you’re not a member, you can of course Join Today!
The Brush Panel and Using a Tablet
2011-07-27 17:00:32 (читать в оригинале)Photoshop is an excellent tool for manipulating photographs but it can also be used as a means to create stunning digital art. This tutorial is part of a 25-part video tutorial series demonstrating everything you will need to know to start producing digital art in Photoshop. Digital Art for Beginners, by Adobe Certified Expert and Instructor, Martin Perhiniak will begin by teaching you how to draw in Photoshop. At the conclusion of this series you will know all you need to produce your own concept art and matte paintings in Photoshop.
Today’s tutorial Part 2: The Brush Panel and Using a Tablet will explain the most important options in the brush palette, explain the differences between a mouse and tablet for digital art, and will also explain the differences between the Wacom line of tablets and which ones are right for you. Let’s get started!
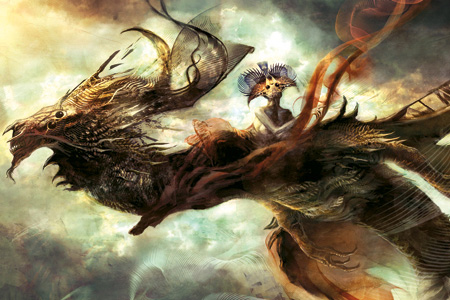
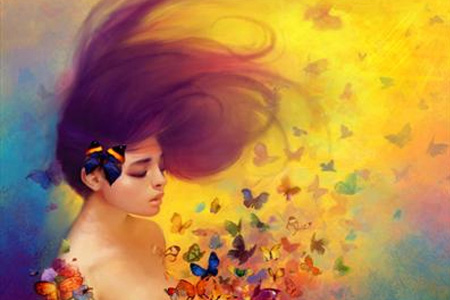
40+ Fascinating Digital Painting Tutorials
2011-07-26 17:00:20 (читать в оригинале)Digital paintings are one art and design trend that isn’t going away any time soon. Digital paintings (examples) are vibrant, display well on screen and take advantage of new technologies like the graphics tablet to make the digital look traditional. If you’re interested in learning to create art through this medium, here are over 40 tutorials to help you begin (or continue) the adventure.
Editor’s note: This article was originally published on Psdtuts in June of 2009.
1. Skin Tones Part 1
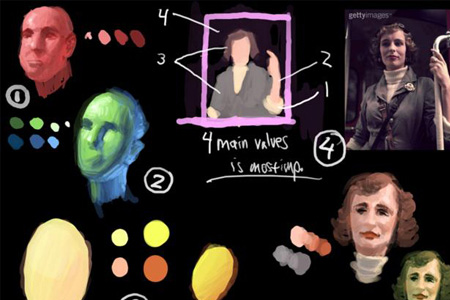
2. Skin Tones Part 2
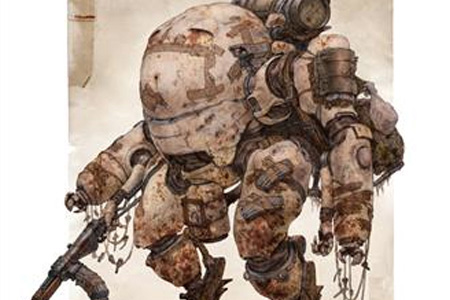
3. Gunman by Craig Mullins
4. Revising Golongrias Picture

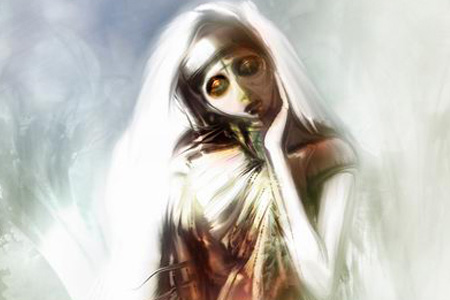
5. Happy Like a Broken Doll
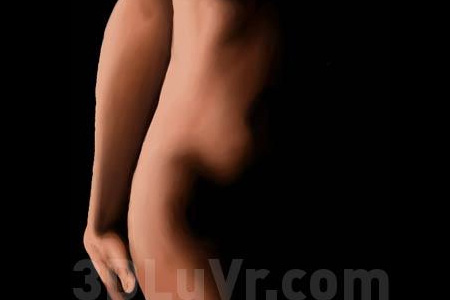
6. Human Skin
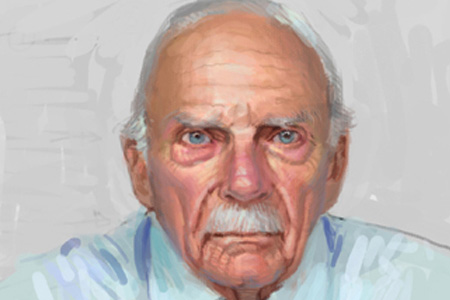
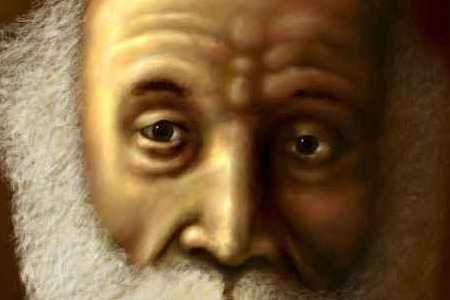
7. Painting an Old Man
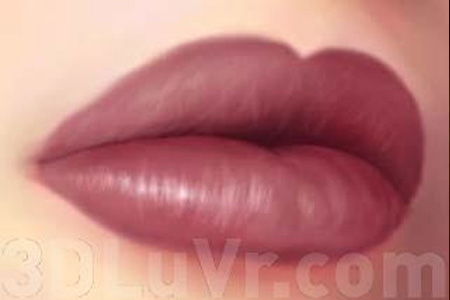
8. Painting Human Lips
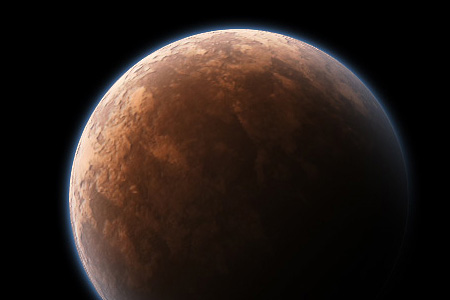
9. How to Make a Planet
10. Space Craft Prototyping
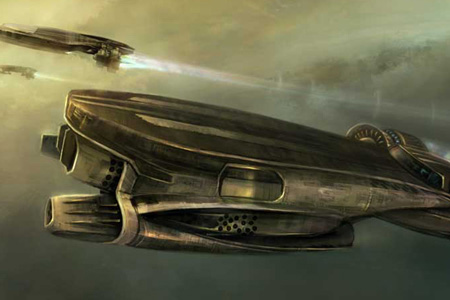
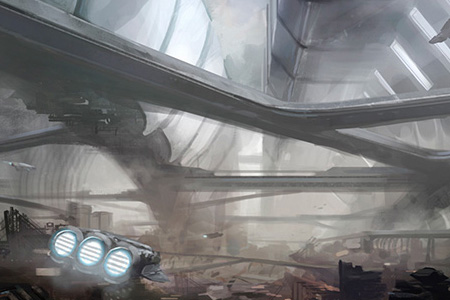
11. Sci-Fi Environment Concept tutorial
12. Digital Illustration Workflow
13. Scene Rendering
14. Abstract Dragon
15. Liberate Your Colors
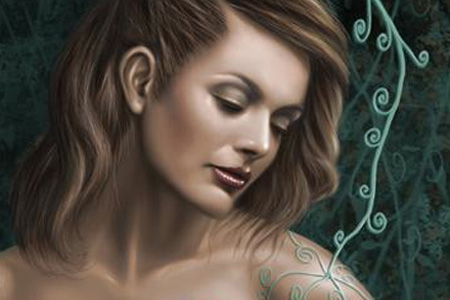
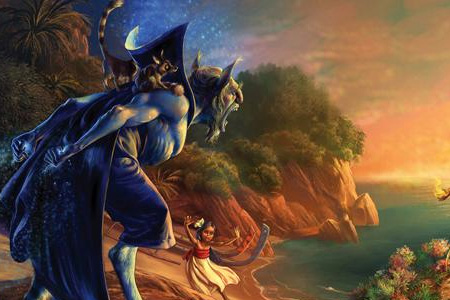
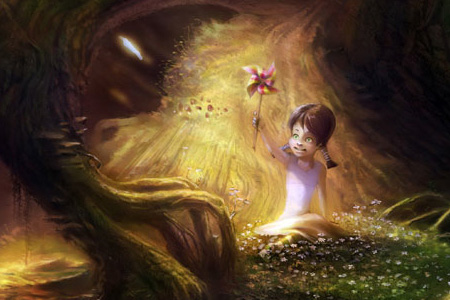
16. Painting a faerie scene

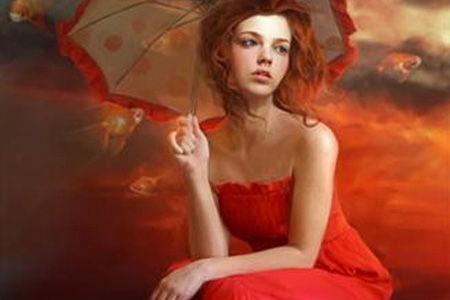
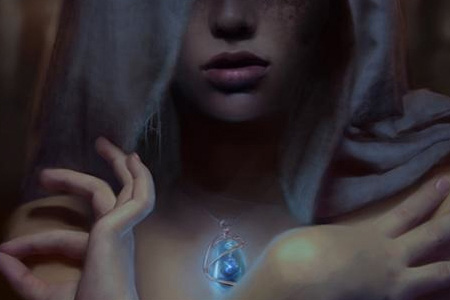
17. Paint a Sexy Siren

18. Portrait Speedpainting
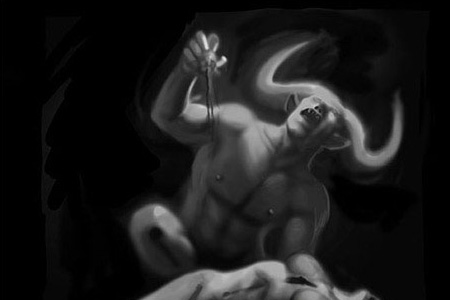
19. Making of Hecate

20. A Traditional Approach to Creating Digital Art
21. Spider Harp

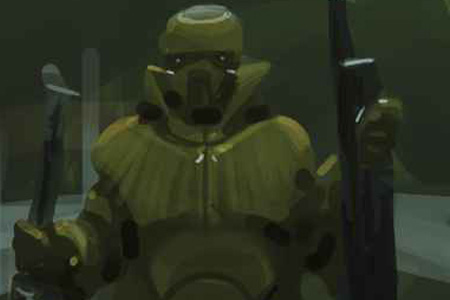
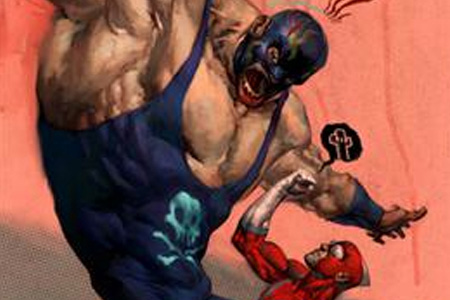
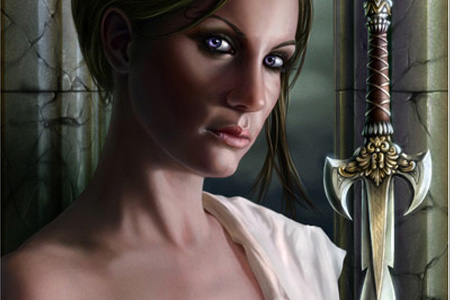
22. Create the Assault Chick

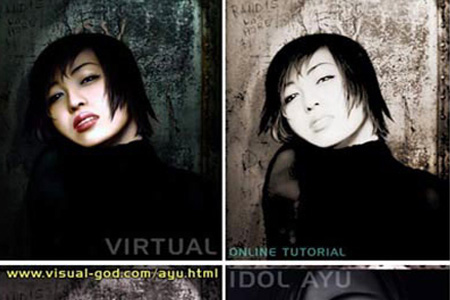
23. Creating the virtual Character AYU
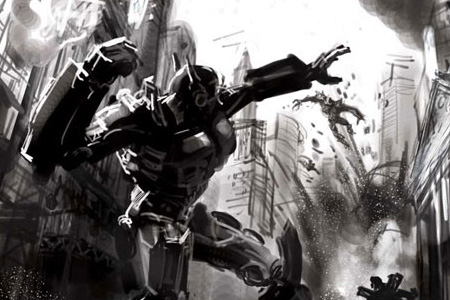
24. Making of Transformers Death Blow
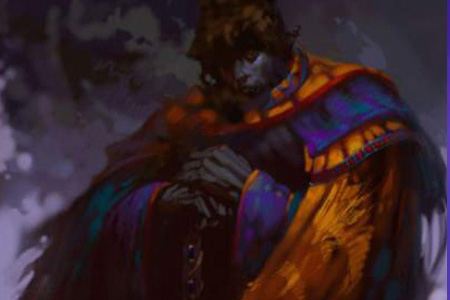
25. The Taming of Naas

26. Create Cool Comic Book Covers
27. How to Paint Feathers and Wings

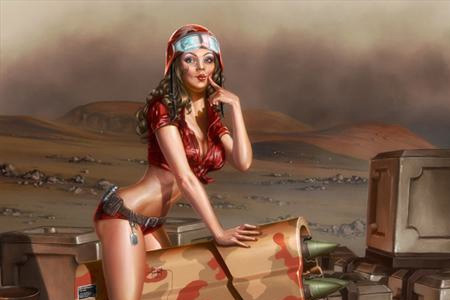
28. New School Pinup Art
29. Children Book Illustration
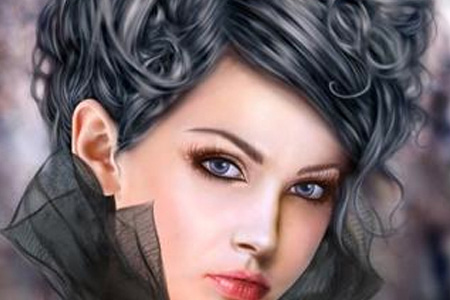
30. Painting Realistic Looking Lips
31. Creating a Robot Concept
32. Making of Howling
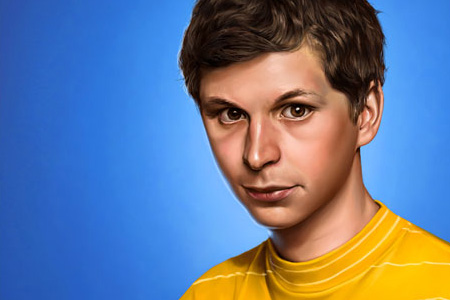
33. Making of Superbad
34. Making of Funfair
35. Making of Cold Sky

36. Painting Clouds

37. Paint a Dragon

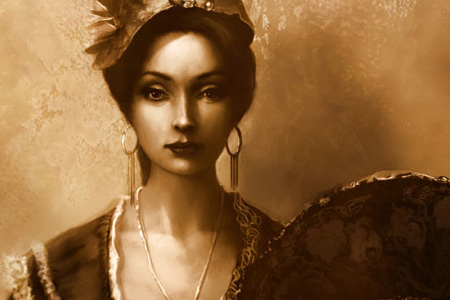
38. The Making of Spanish Girl
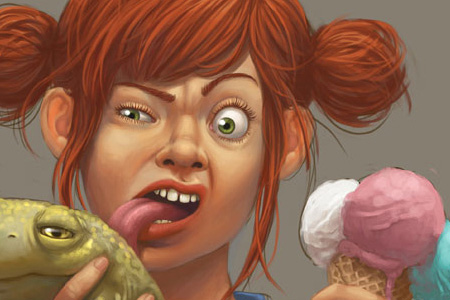
39. The Making of Fresh Meat
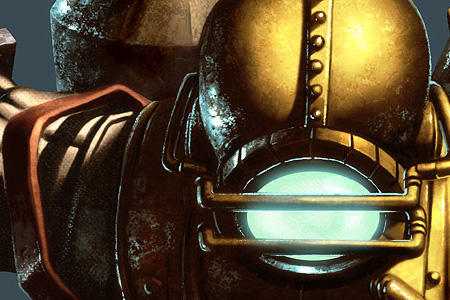
40. Bio Shock Digital Painting
41. Digital Painting Tutorial
42. Making of Under the Root
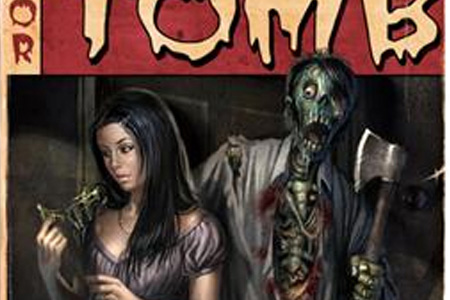
43. Drawn of the Dead
44. Using Brushes for Fabric and Costumes
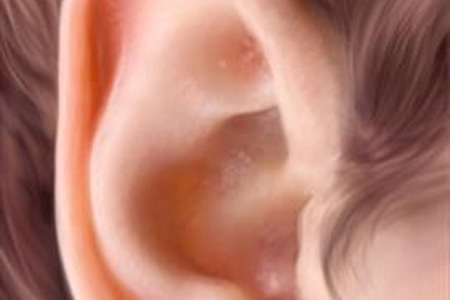
45. Paint Realistic Ears
46. Paint Realistic Hands
47. Making of Equilibrium
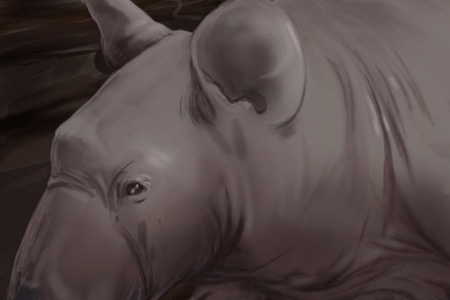
48. Advanced Digital Painting
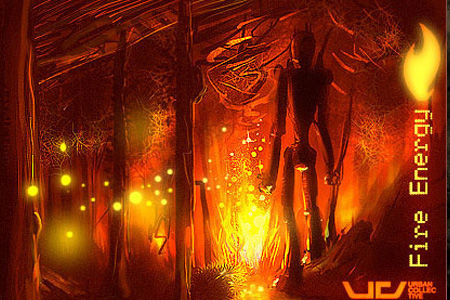
49. Making of Fire Energy
Win a Free Copy of Filter Forge (x3)
2011-07-25 20:00:30 (читать в оригинале)Let’s be honest, most of Photoshop’s default filters and effects can be a bit cheesy. Last month we introduced you to Filter Forge, a third-party plugin for Photoshop that allows you to do some pretty amazing things with filters, and even create your own. We also gave away 3 copies of Filter Forge Basic Edition to 3 lucky Psdtuts readers. Today, we have decided to do it again by giving away another 3 copies. To enter, all you have to do is submit your entry using the form below.
Filter Forge is a versatile Photoshop plugin which allows both novice and expert users create a wide variety of realistic and abstract textures and effects. Users can take instant advantage of over 8100 free community-created filters in the online filter library, or create their own filters in the visual filter editor by assembling them from components such as blurs, gradients, color adjustments, noises, distortions, or blends – without writing a single line of code.
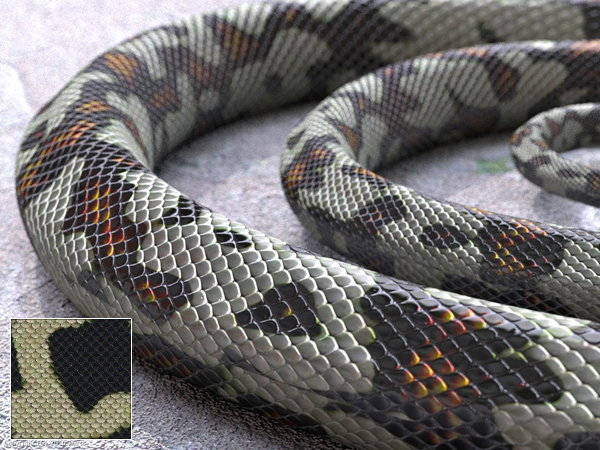
In this image Filter Forge was used to create the snakeskin: Pattern maps, bumpmaps, and normal maps. The 3D model was made in Microstation V8i, rendered with Luxology Render. No post work.
See More Examples
On the surface, Filter Forge is just a Photoshop plugin, a pack of filters that generate textures, create visual effects, enhance photos, and process images. However, there are some things that make Filter Forge unique:
- You can create your own filters. Filter Forge comes with a visual node-based editor allowing you to create your own filters – textures, effects, distortions, backgrounds, frames, you name it. All filters automatically support 16- and 32-bit modes in Photoshop, real-world HDRI lighting, bump and normal maps, huge resolutions, and most filters can be seamlessly tiled.
- You get free access to over 8100 user-created filters. Anyone can contribute their textures and effects to the online filter collection so it grows with every submitted filter. This means the more people use Filter Forge, the better it gets.
To win a free copy of Filter Forge, all you need to do is enter using the form below.
Submit Your Entry
Up For Grabs
- 1 copy of Filter Forge Basic to 3 readers
Rules
- To enter, submit your entry using this form.
- You may only enter once.
- Make sure to enter a valid email address so that we can contact you.
- Entries will be accepted until Friday, July 29, 2011 at 11:59 PM, EST.
To learn more about Filter Forge, visit their website, download the demo version of the software, and check out their gallery.
Download Demo
Editor’s note: This post was sponsored by Filter Forge.
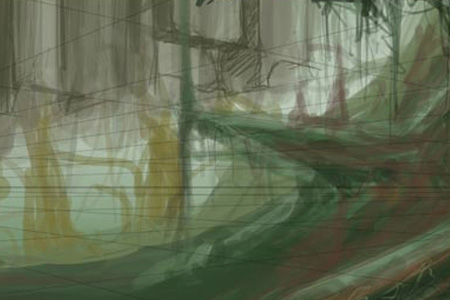
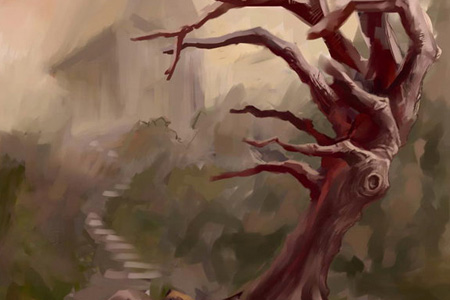
Create a Panoramic Photo Manipulation in Photoshop (Part 1: Making The Panorama)
2011-07-25 17:00:55 (читать в оригинале)In this two-part tutorial, we will demonstrate how to create a panoramic post-apocalyptic photo manipulation in Photoshop. In part 1 we will explain how to shoot the needed photos, how to make batch adjustments in Camera Raw, automatic alignment and merging, and then how to correct the perspective. In part 2 we will show how to use this panoramic image to create a snowy, post apocalyptic photo manipulation. Let’s get started!
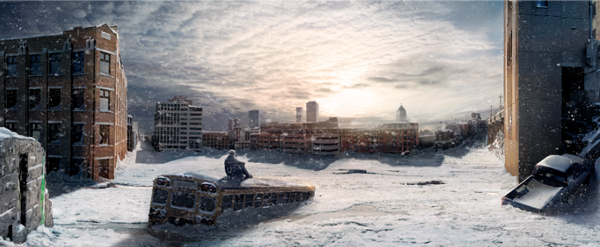
Preview of Part 2
In Part 2 of this tutorial, we will transform this scene into a post-apocalyptic matte painting. Stay tuned!
Before Getting Started
Now before we get started, Alvaro Guzman made a really good tutorial about making panorama on this site about which you can find here. I highly recommend you read this prior to this tutorial as the techniques he showed, especially the first 3 steps are good and I won’t cover them here. In this tutorial, we will use an alternative way to merge the pictures together.
In addition to his very useful tutorial, I would add three additional insights about shooting of the photos.
#1 – Use and SLR camera
If you plan on making a panorama, I highly recommend you use a professional camera. Those allow you to manage shutter speed and aperture by yourself, so you can make sure they stay the same for every shot, ensuing consistency throughout the pictures, which is indispensable for a quality panorama. I also recommend you set your camera on manual focus after you took the first picture to make sure the depth of field remain the same.
#2 – Set the image quality to RAW format
Another reason I recommend using a professional camera is because they come with the option to take your photo in RAW quality. I won’t go much into details about the format (you can get more information here, but you can see it as an unprocessed film in traditional photography: it gives you greater management over your photos, which we’ll get into later in this tutorial.
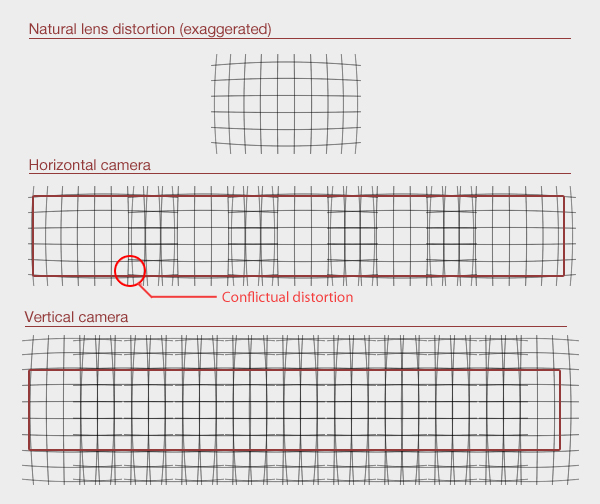
#3 – Place the camera vertically
This is a really good tip when doing a horizontal panorama. Basically, every camera lens will cause a slight natural distortion in the picture. These would probably not even be noticeable on a single photo, but might become problematic when trying to stitch multiples photos together. Placing the camera in a vertical position will allow less distortion conflict since the left and right part of your picture will be less affected by the distortion. For a better understanding, you may refer on the following image.
However, I must point out that in our tutorial, this tip will not prove as helpful since we will be making a 3-row panorama in which distortion will be unavoidable.
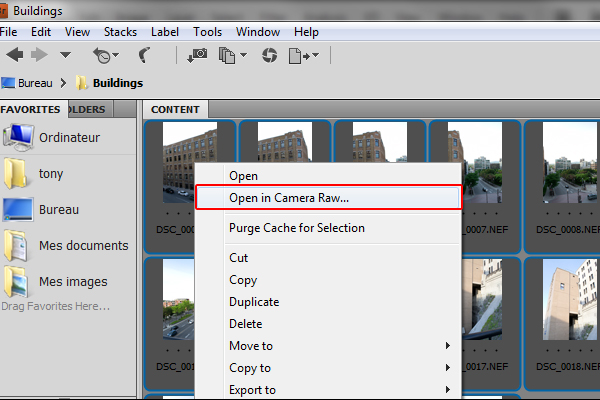
Step 1 – Opening the images in Camera Raw
First off, lets start by opening Adobe Bridge. Locate your picture’s folder and open the “Building” folder. Select all the pictures in the folder, right-click and select “Open in Camera Raw”.
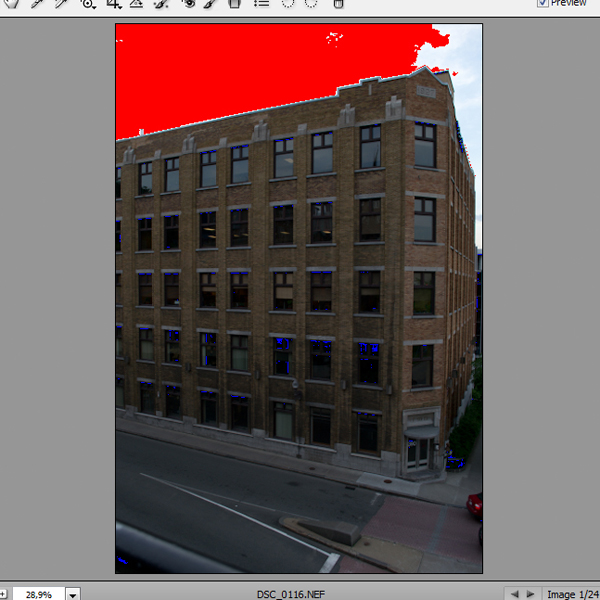
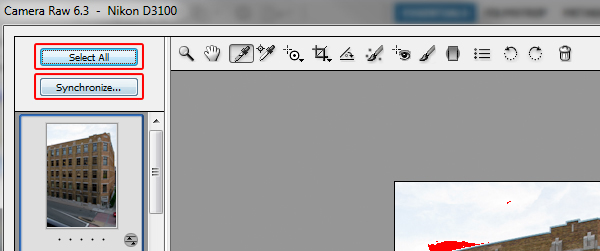
If you haven’t already, press U and O to toggle both the Shadow and Highlight Clipping Warning. You should get something like the image below.
You can see the sky is filled with red and that there are some blue areas on the buildings. This is a warning that, given these settings, the image will retain no color information except pure black and white for those area, which is usually a bad thing. Don’t worry, we will get to fix this later.
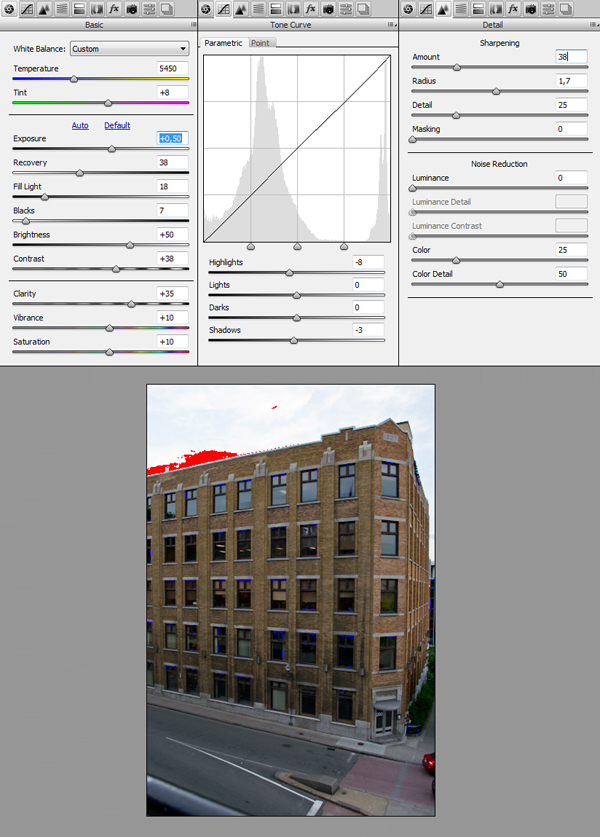
Step 2 – Camera Raw adjustments
Now I am not a Camera Raw expert, but I added the following adjustments to my image. Basically, I tried managing the Temperature and the Tint so the gray areas have a balanced amount of red, green, and blue. I used the Recover and Fill Light slider to restore some of the burned black and white area. I also gave the image a little bit of sharpening and saturation.
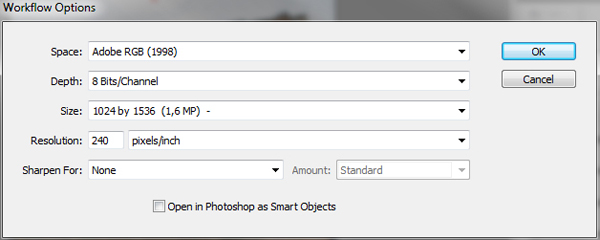
Once you are done, you can click on the little line of text underneath the preview area.
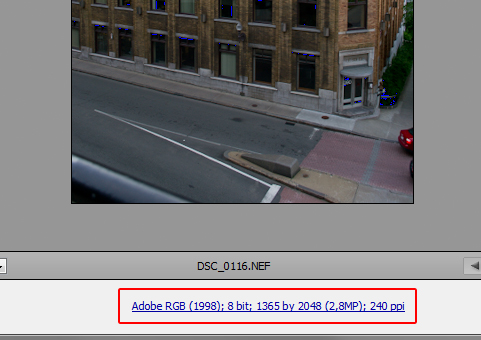
This area allows you to manage some technical aspects of your pictures. If it isn’t selected yet, pick the Adobe RGB (1998) color setting. Since this is just a tutorial and because the images are large and would take a long time to process later on, I dropped the size to 1024 by 1536 pixels. However, for a more professional result, or if you want to preserve your image’s quality, you should go with the setting that have no + or – at the end. Once you are done, press Ok.
Once you are satisfied with the result, Click on the Select All button located in the top left area of the window, and then click Synchronize. Another window will pop up showing what setting you want to apply to your photos. Click Ok and then press Done to close the Camera Raw interface.
Step 3 – Photoshop alignment and merging
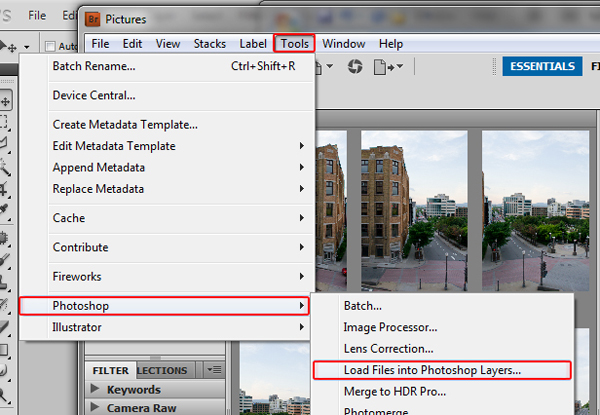
Back to Bridge, select you pictures once again, then this time, go to Tools > Photoshop > Load Files into Photoshop Layers. This process might take a while.
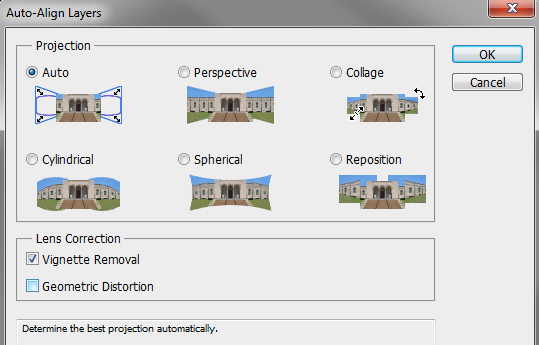
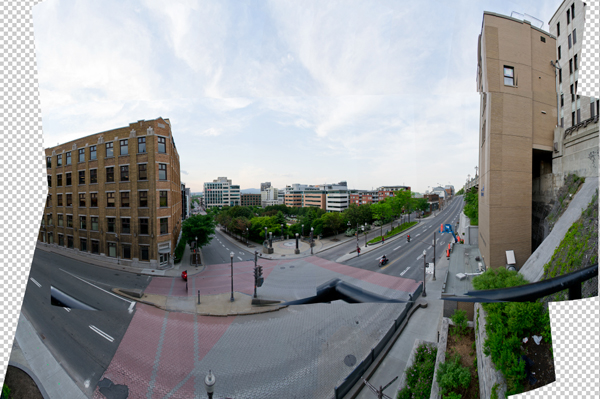
You should now have one Photoshop file with all the photos on individual layers. While having all your layers selected (click the first one, hold Shift and click the last one), go to Edit > Auto-Align Layers. A window should pop up offering multiples way of aligning your layers depending on what result you want. Pick Auto and check both Vignette Removal and Geometric Distortion, then press Ok. If you haven’t reduced the image size in the previous step, arm yourself with patience as this process might also take quite a while.
You should get something like this.
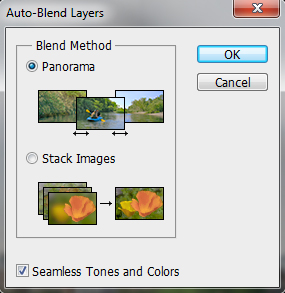
Then, with all your layers selected, go to Edit > Auto-Blend Layers. Another window should pop up asking you if you want a panorama or to stack images. Pick Panorama; check Seamless Tones and Colors, then press Ok. This should also take a while.
You should get this.
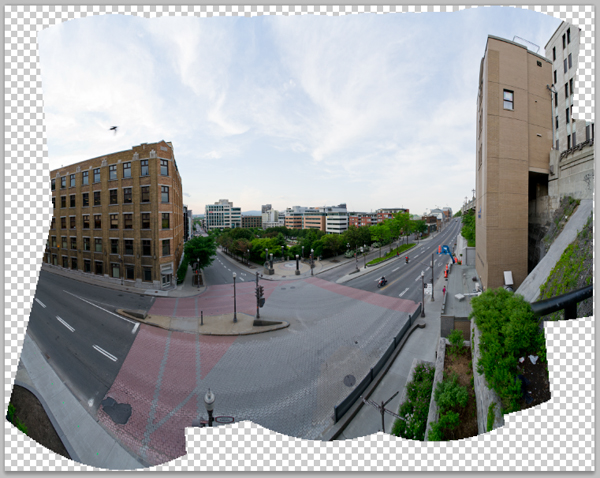
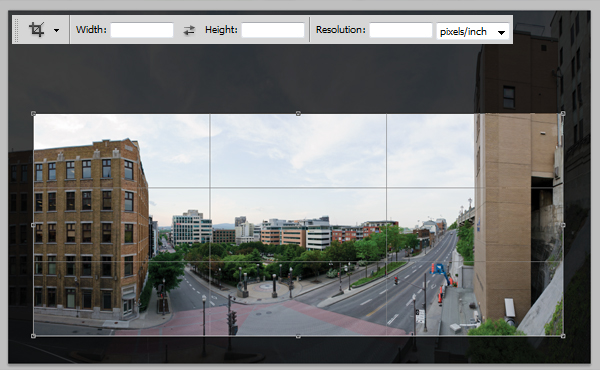
Step 4 – Cropping the image
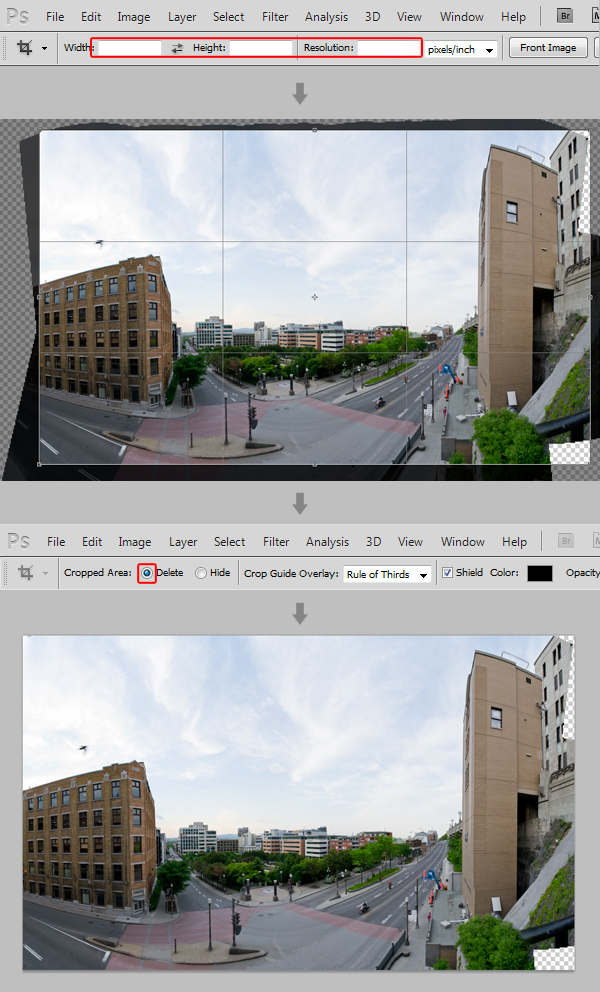
The panorama is done, but it’s all distorted. To make this easier to correct, we’ll need to give our image a rectangular shape first. Select the Crop Tool (C), make sure the Width, Height and Resolution fields are empty, and then drag this selection over your image. Remember to make the crop larger than what you want your final image to be. Then, make sure that the Cropped Area is set to Delete, and press enter.
Step 5 – Correcting the distortion
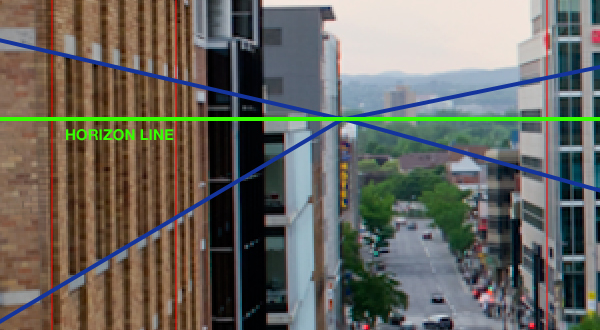
Before making any changes to your image, I suggest you save your file. Press Command/Ctrl + R to make your rulers appear. You can now click and drag on your rulers to place guides over your canvas. Place vertical guides wherever you see visual lines created by the elements within your image.
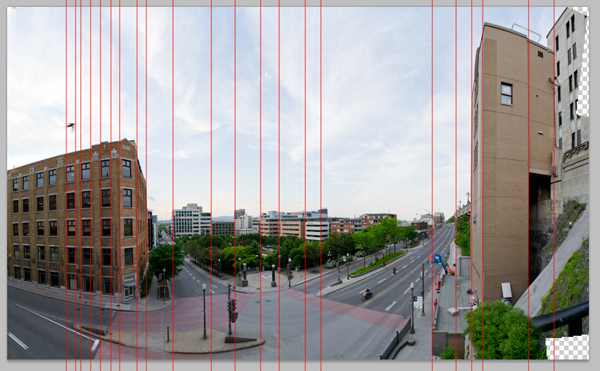
You could also place a guide on the horizon line. A good tip to find it is to look for converging visual lines like the windows on the building.
If your camera wasn’t perfectly horizontal when you took the pictures, you might need to rotate the image for it to match your horizon line. However, in our case, we won’t need to.
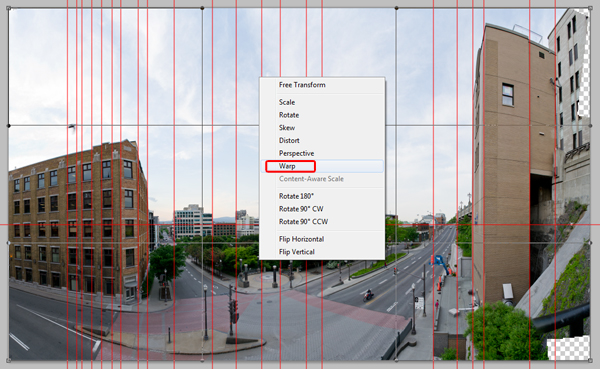
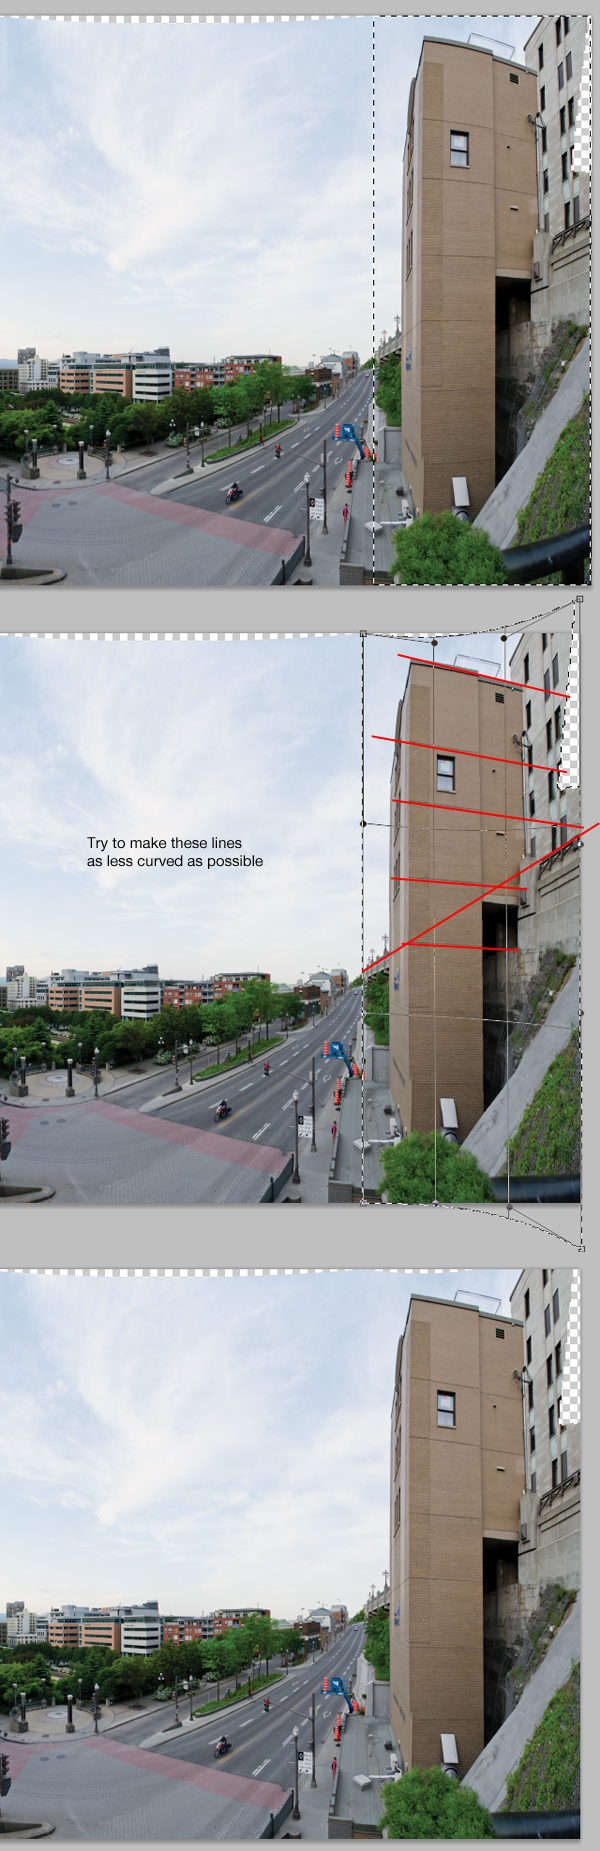
To correct the distortion, we will use the Warp Transform tool. Select your layer, then go to Select > All (or hit Command/Ctrl + A) to select the whole image. Then go to Edit > Transform > Warp, or simply hit Command/Ctrl + T, right click and choose Wrap.
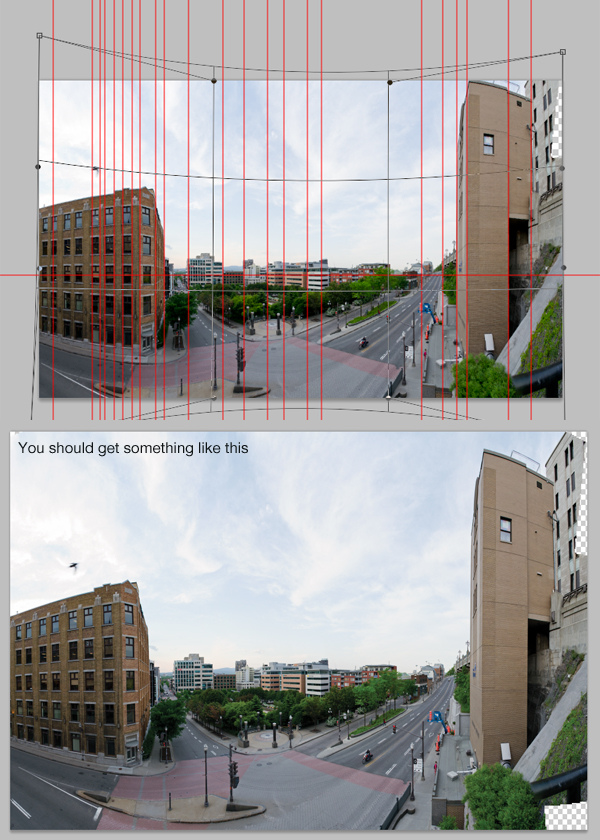
Now we can start playing with the handles to correct the perspective. The trick here is to have the vertical lines created by the architectural elements match your vertical guides. Also, we will try to fix the fish eye distortion we got when aligning our layers. Start by giving the image a good once over by dragging the top left and top right handles up, and the bottom left and bottom right handles down. Press enter to confirm.
Some parts of the image, like the left and the right building will be easier to fix if done individually using selections. Let’s start with the left building. Take the Rectangular Marquee Tool (M) and make a selection on the left building. Then, once again, enter the Wrap transformation mode and play with the left handles to straighten the building.
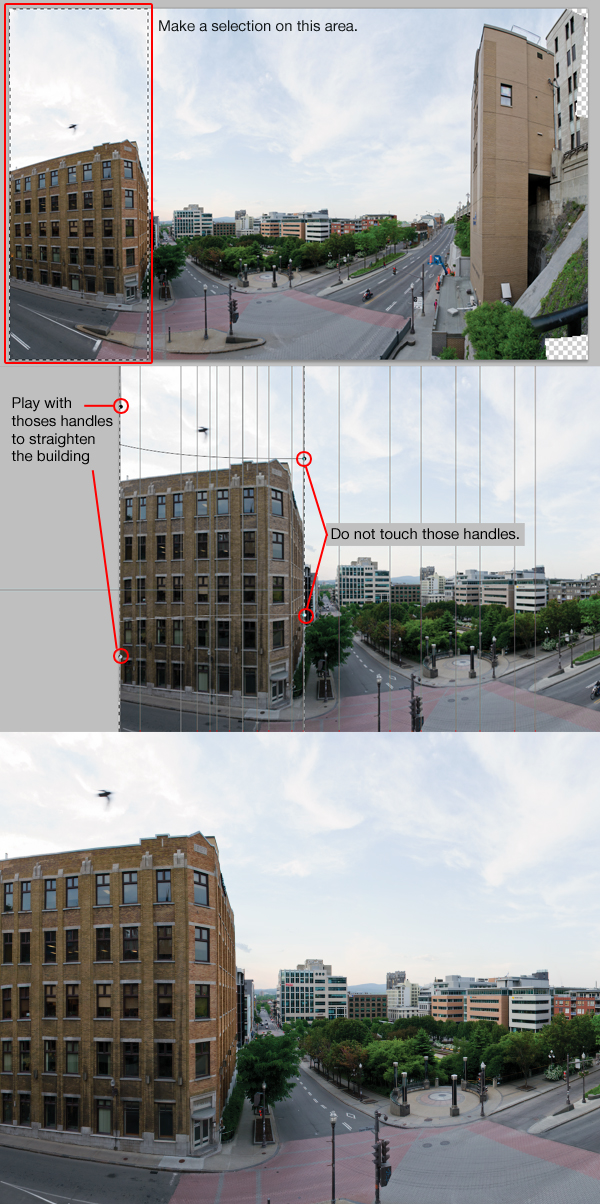
Next, let’s do the same for the building on the right.
The left and right buildings are slanted outward a bit. To fix this, select the Rectangular Marquee Tool, make a selection on the left building. You can use the Polygonal Lasso Tool and remove some of the selection in order to only have the left building. Then, using the Warp transformation tool, make the building match the vertical guides we previously created.
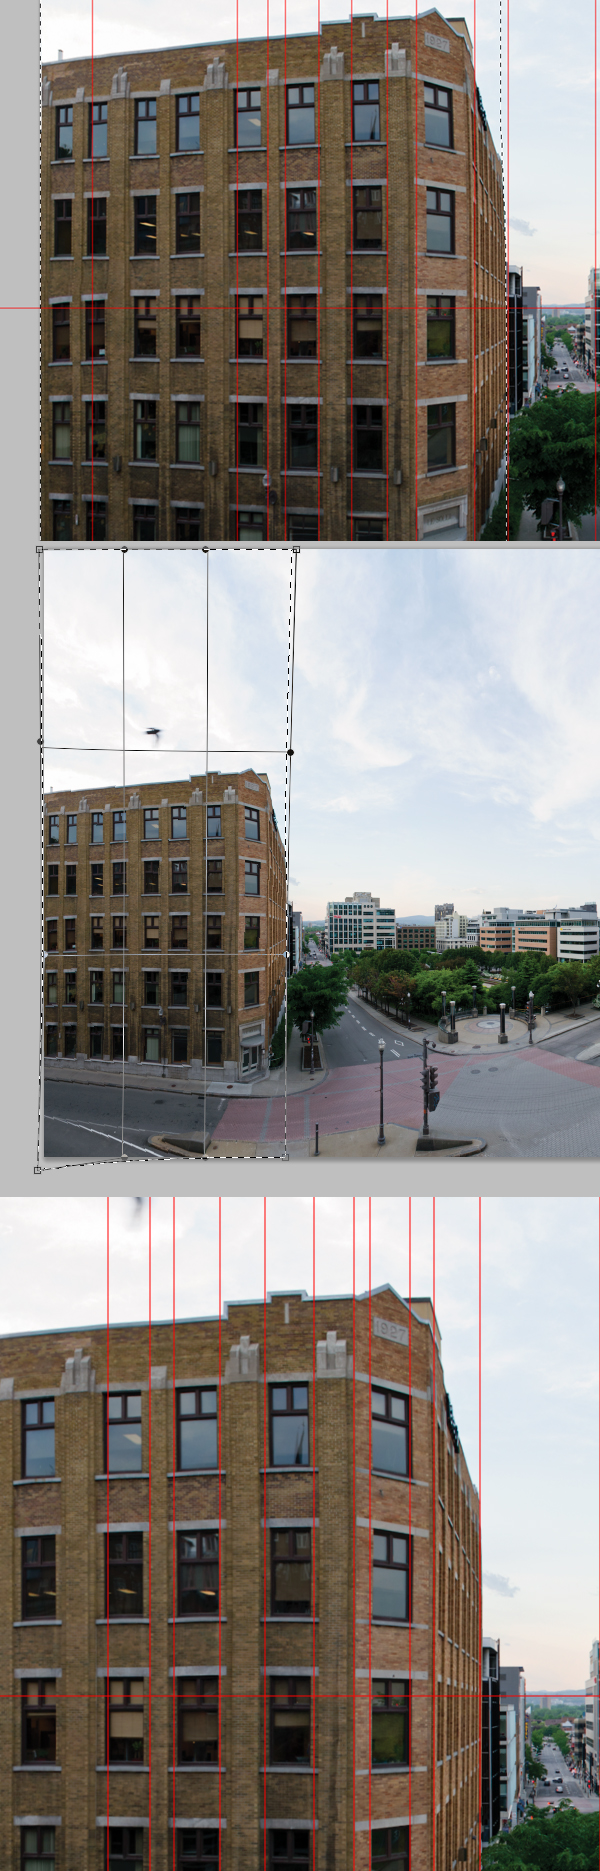
Then, do the same for the right building. For this one, we’ll have to do it in two steps.
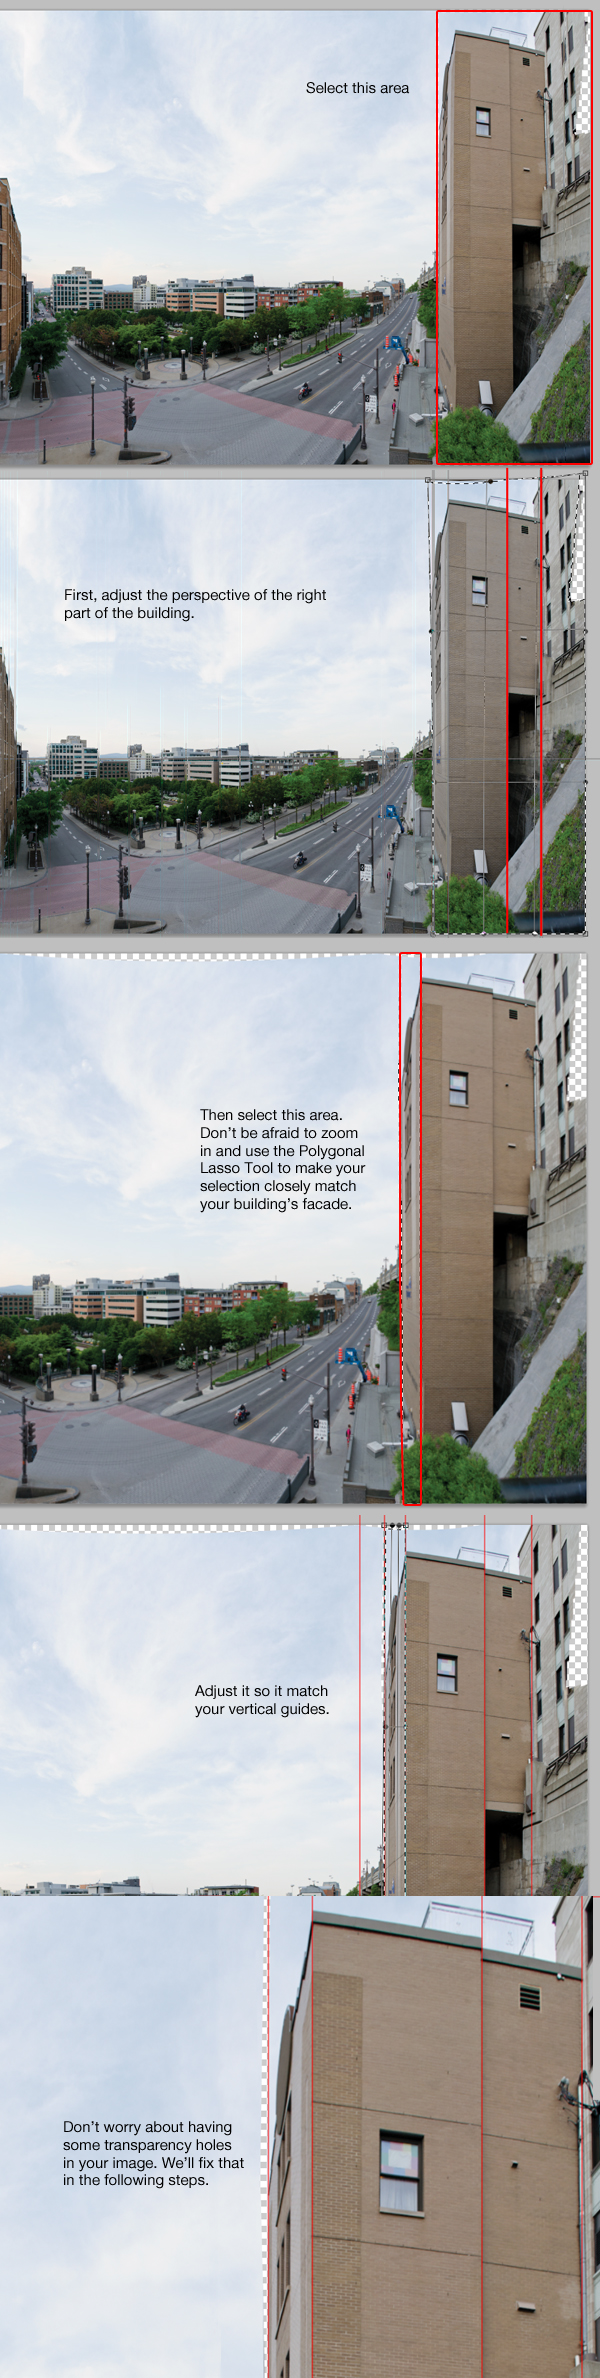
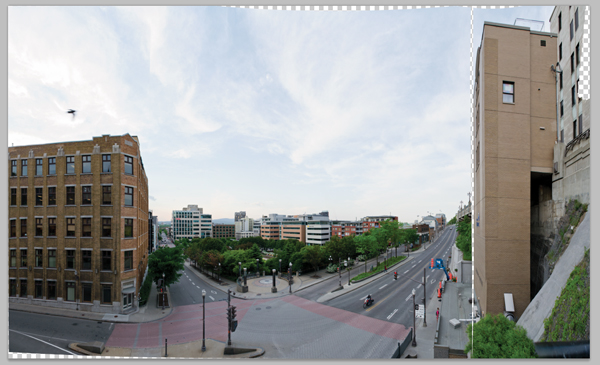
In the end you should get something like this. This is not 100% perfect, but it will be enough for what we are trying to achieve. Feel free to go more in detail to get a better result, but please note that every time you apply a transformation, the image’s quality is lowered. So try doing it with a limited number of transformations.
Step 6 – Filling the transparency holes
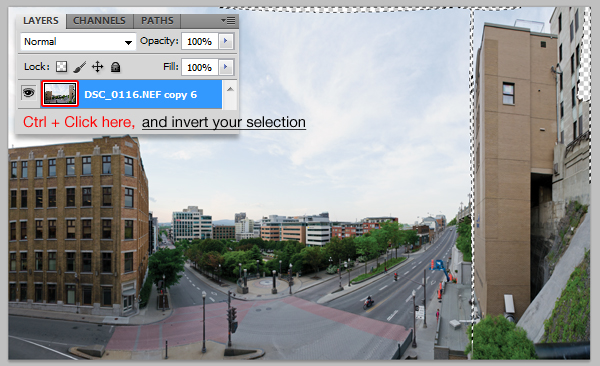
Our transformations have created a few empty areas in our image we’ll need to fix. Command/Ctrl + Click on your image to create a selection of it, then invert it (Command/Ctrl + Shift + I or Select > Invert).
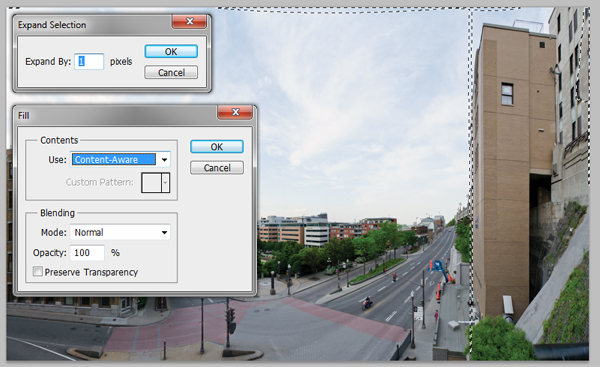
Go to Select > Modify > Expand and expand your selection by 1 pixel. Then, go to Edit > Fill (Shift + F5), and choose the Content-Aware fill in the Contents drop down menu. Press Ok. Make sure you keep your selection for the next step.
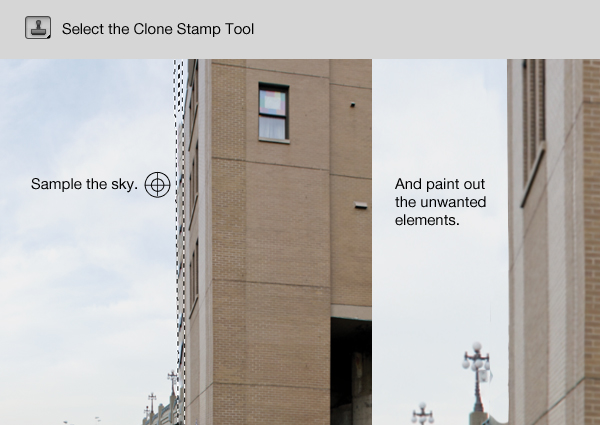
Step 7 – Fixing the imperfections
Create a new layer (Shift + Command/Ctrl + N) on which you will add the corrections. With your selection from the previous step, pick the Clone Stamp Tool (S). Make sure your tool is set to Sample: All Layers. Zoom in onto the right building, hold Alt and Click in the sky to pick a sample area, and paint out the area that was badly filled with building elements. You might have to do some more clone stamping after having removed the selection to get a good result.
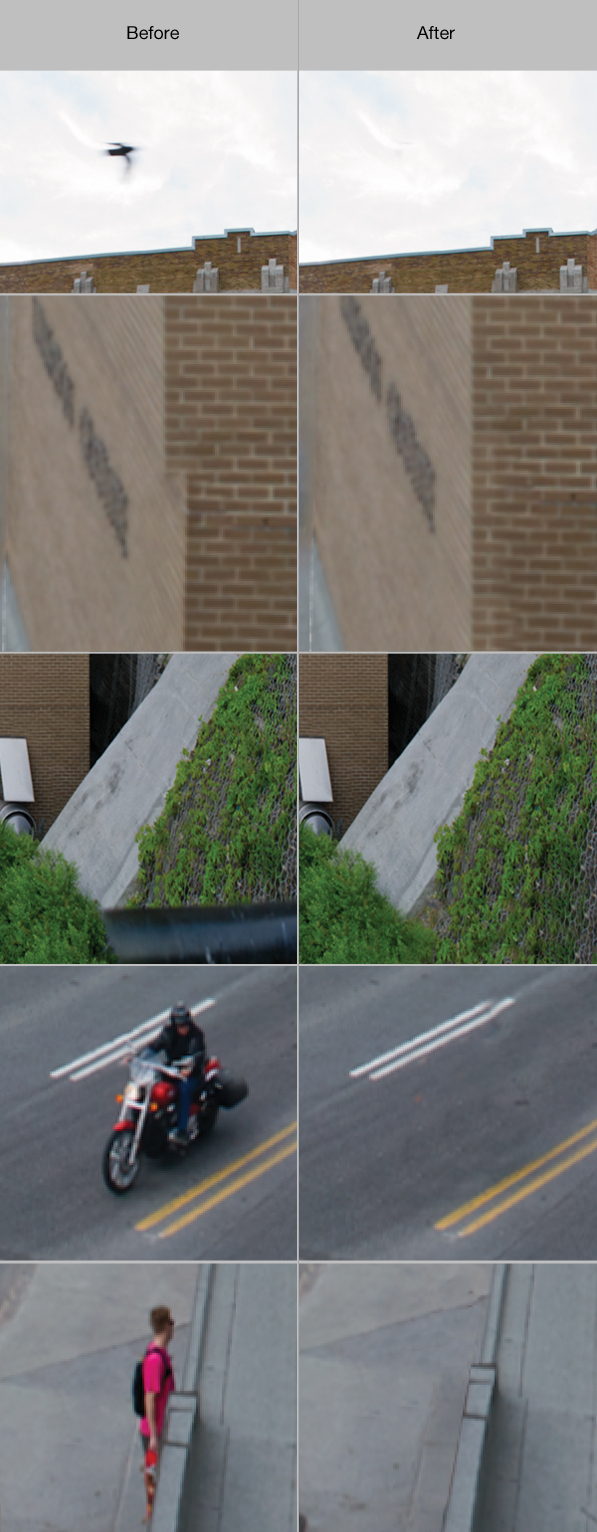
Using the same technique, you can fix the remaining imperfections or annoying elements throughout your image.
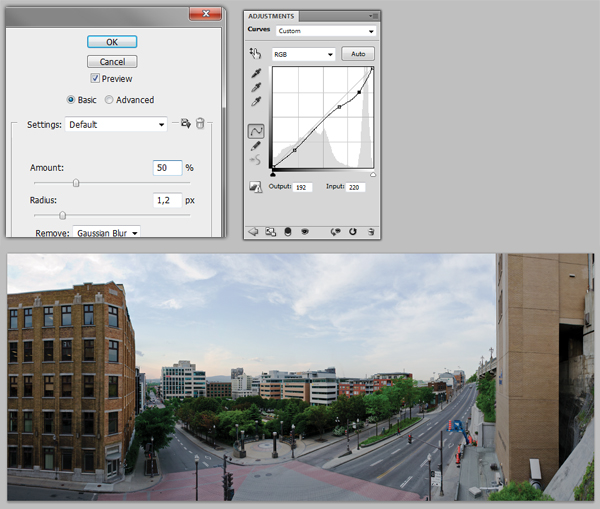
Step 8 – Cropping and adding the final touches
Once you are satisfied with the image, merge all the layers (Shift + Command/Ctrl + E or Layer > Merge Visible). Then, take the Crop Tool (C), and draw a selection on the area you wish to crop. Don’t forget to make sure that the Width, Height and Resolution fields are empty, and confirm.
A good way to add a little bit of punch to the image is by increasing its sharpness. To do so, go to Filter > Sharpen > Smart Sharpen. Check the Preview box and play with the setting until you are satisfied. You can also increase the contrast using a Curve Adjustement (Image > Adjustement > Curves or Command/Ctrl + M).
Conclusion
The technique showed in this tutorial is only one of the many ways you can create a panorama in Photoshop. Auto-Align Layers and Auto-Blend are two very powerful features in Photoshop that are worth knowing. In this case, we’ve used them to create a panorama, but there are many other uses you can find for them.
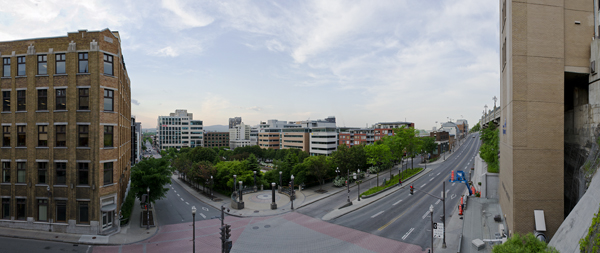
Now stay tuned for the next part of this tutorial, in which we’ll transform this scene into a post-apocalyptic matte painting!
|
| ||
|
+1561 |
1596 |
fiona |
|
+1550 |
1597 |
Алексей Чернов |
|
+1529 |
1559 |
Elen_i_rebyata |
|
+1513 |
1584 |
Малти_Ошер |
|
+1512 |
1589 |
Дрочливый_Драчун |
|
| ||
|
-2 |
74 |
Рыжая_Лада |
|
-2 |
1264 |
Сайт визажиста Мокровой Инны блог |
|
-2 |
947 |
G-Traveler | Сайт заметок путешественника |
|
-5 |
53 |
BJohn |
|
-6 |
17 |
Аццкей_Сотона |
Загрузка...
взяты из открытых общедоступных источников и являются собственностью их авторов.