| Сегодня 23 мая, четверг |
|
|
|
Какой рейтинг вас больше интересует?
|
Бесплатные иконки Google+2011-07-25 18:18:20Новая социальная сеть,запущенная всего то чуть меньше месяца назад,с катастрофической скоростью ... + развернуть текст сохранённая копия Тэги: download, icon, иконка, скачать Иконки для сайта2011-07-17 14:51:45Сегодняшняя заметка посвящена иконкам для WAP сайтов. Украшая мобильный сайт иконками, следует ... + развернуть текст сохранённая копия Тэги: 3.0, fatcow, fugue, host, icon, иконка, сайт, сайтострой Графический интерфейс IceWM в Linux2011-07-12 05:29:01Все знают популярные графические интерфейсы, такие как - KDE, Gnome. Они имеют свои особенности, и ... + развернуть текст сохранённая копия Тэги: gnome, icewm, kde, linux, графический, менеджер, оконнй, оконный, персонализация, среда Планшеты / Обзор Acer Iconia TAB W500 (часть вторая, программная)2011-07-04 19:14:24... /0_5ce9f_48acb6e0_M" alt="Acer Iconia TAB W500" title ... ="Acer Iconia TAB W500" align ... + развернуть текст сохранённая копия Тэги: ace, iconia, tab, w500, window Create a Star Trek Style Communicator in Photoshop2011-07-04 19:00:37Advertise here In this tutorial, we will draw a retro Star Trek style communicator, a voice communication device used in the original Star Trek series. We will combine layer styles and lots of manual drawing. So, prepare your Wacom to boldly go where no Photoshop tutorial has gone before.
Tutorial AssetsThe following assets were used during the production of this tutorial.
Step 1: Preparing BackgroundCreate new file, with size 600×660 px. Fill Background with color: #ababab.  Step 2Create new layer and add gradient from blue to black.  Step 3Set blend mode to Screen and reduce its Opacity. 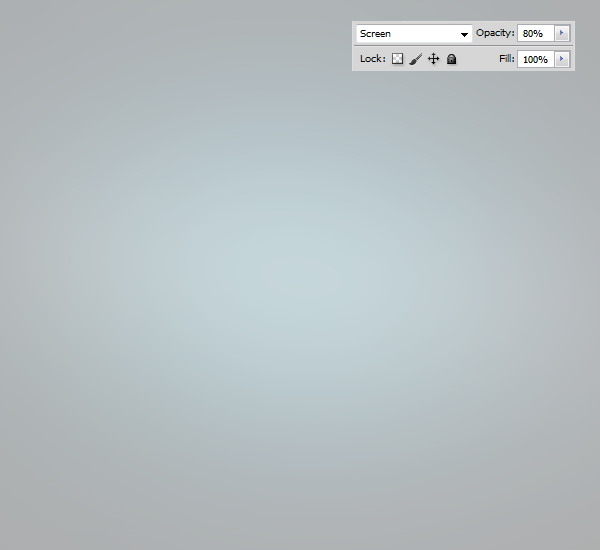 Step 4: Communicator Basic ShapeDraw a rounded rectangle with radius 15 px and color #625f5f. 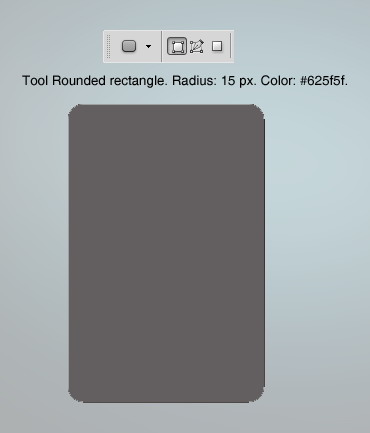 Step 5Activate pen tool and click middle top and middle bottom to add new points. 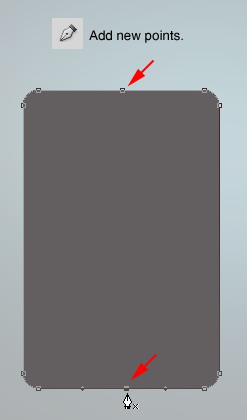 Step 6Use Direct Selection Tool to modify each point until we have this following shape. Add subtle Gradient Overlay. 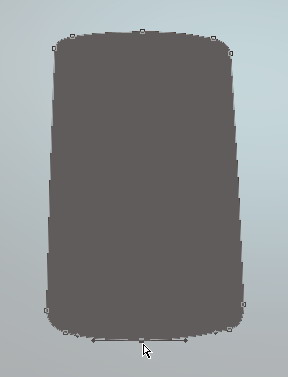   Step 7Duplicate basic shape we have just created by pressing Command/Ctrl + J. Change its color to #2f2229. Resize it to 98%. Add Gradient Overlay.  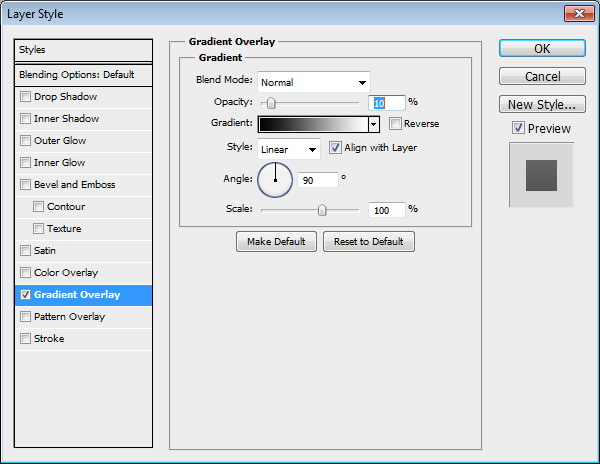 Step 8Duplicate layer shape by pressing Command/Ctrl + J. Change its color to #3c3037. Add a rounded rectangle path and set its mode to Subtract. 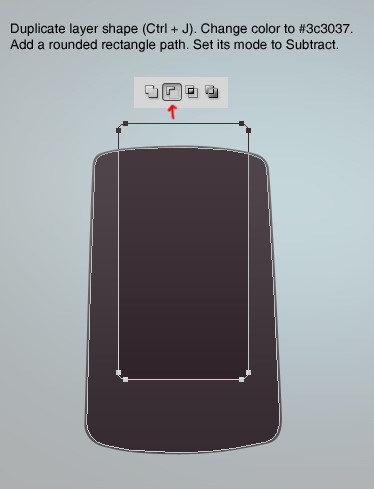 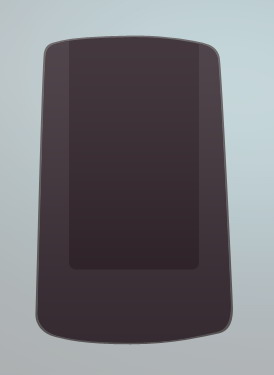 Step 9Command/Ctrl-click layer to create a selection based on its shape. 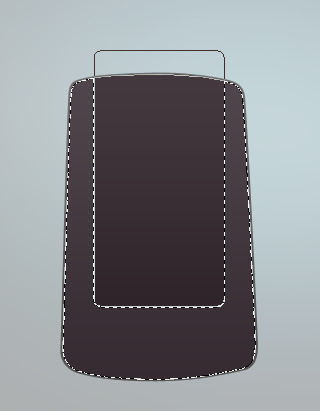 Step 10Create new layer. Hit Command/Ctrl + H to hide the selection edges. Activate soft brush tool. Paint highlight on left side of the shape. 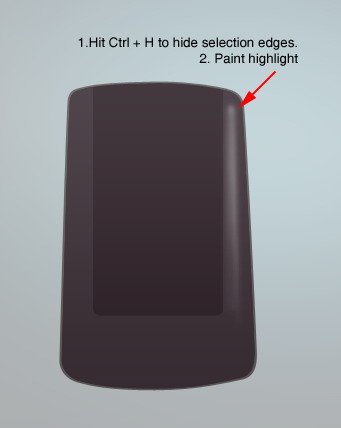 Step 11Draw another highlights on indicated areas. It will be easier if you do all strokes on different layers. This way, you can reduce the layers Opacity to reduce its effect. Or, you can simply delete the layer if you don’t like the result. 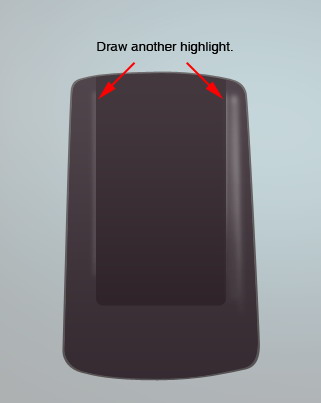 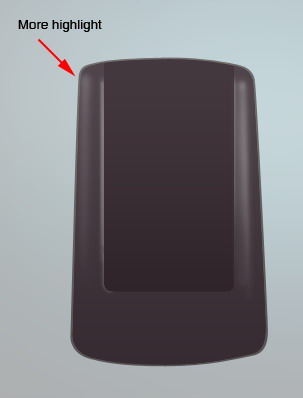 Step 12Duplicate shape we have created earlier. This time set rounded rectangle mode to Intersect. Change its color to #141314. 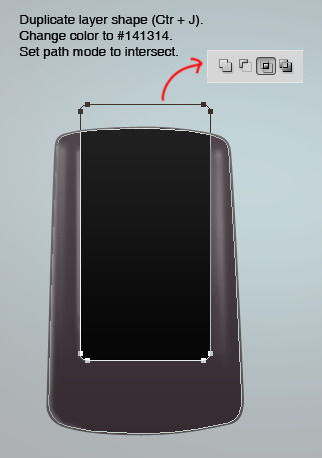 Step 13Draw new shape made from two stacking rectangle. Set both paths mode to Add to Shape. Set its color to #362b31. Add Layer Style Gradient Overlay. 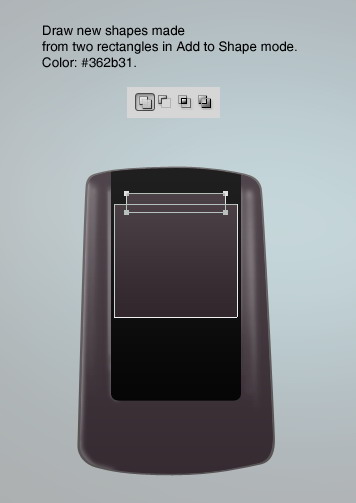 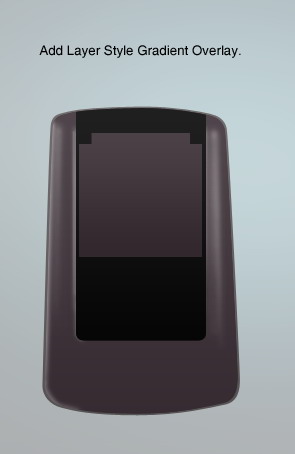  Step 14Create new layer and convert it to Clipping Mask by pressing Command/Ctrl + Alt + G. Paint highlight on some parts of the shape. 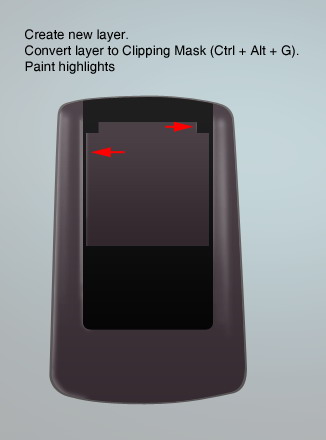 Step 15Of course, don’t forget the shadows. 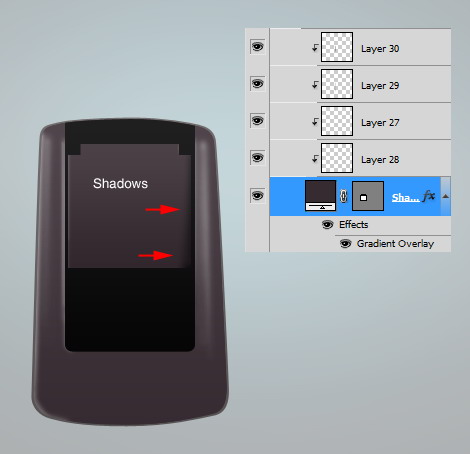 Step 16Draw a rounded rectangle with color #e1cece. Add Layer Style Gradient Overlay. 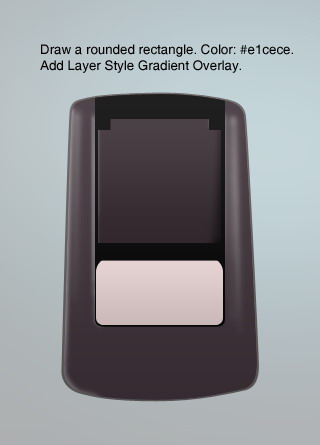  Step 17Create new layer and convert it to Clipping Mask. Draw shadow on lower corner to add depth onto the shape. 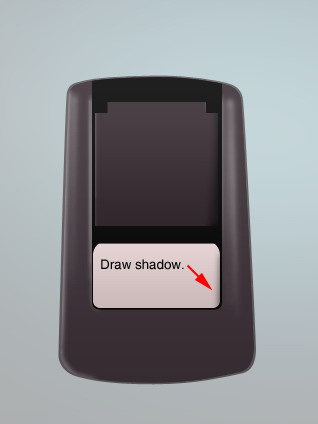 Step 18Draw a rectangle shape with color #dac9c9. Add following Layer Styles. In Pattern Overlay setting, use Pixel Patterns from PSDfreemium 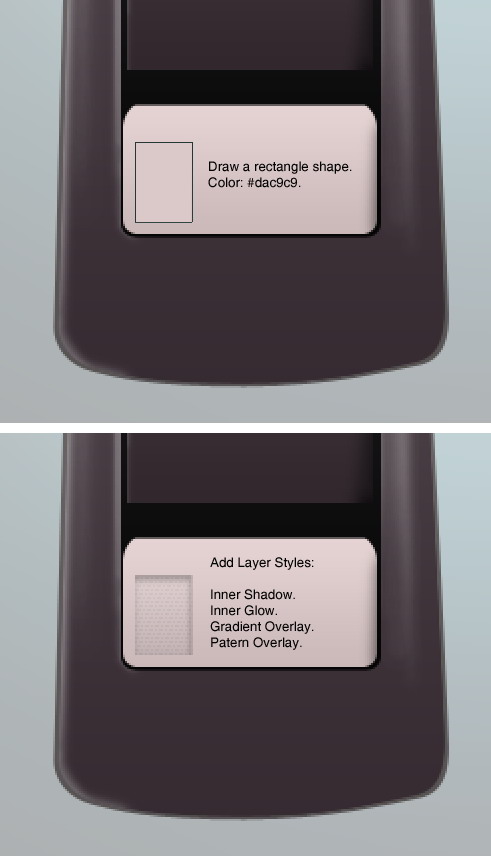 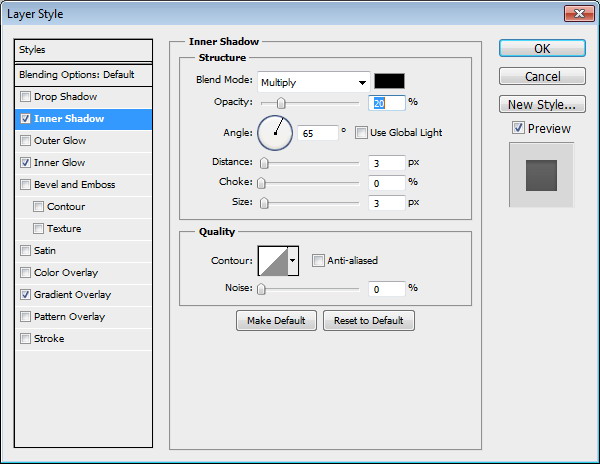 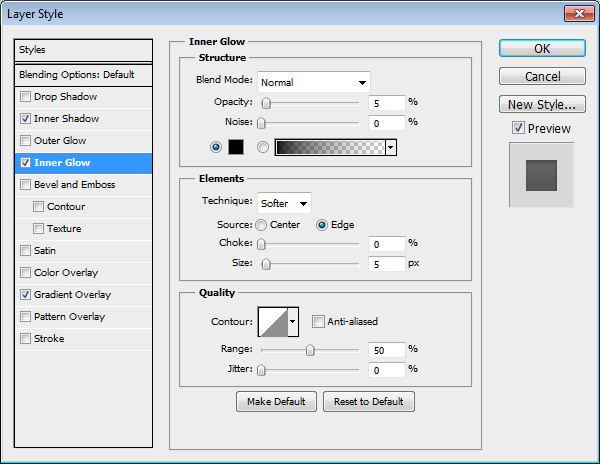 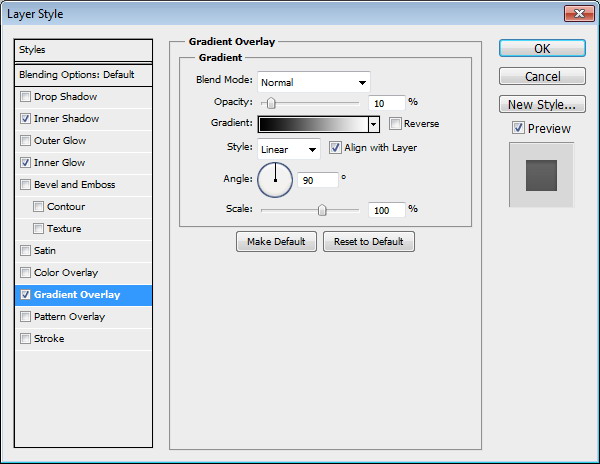 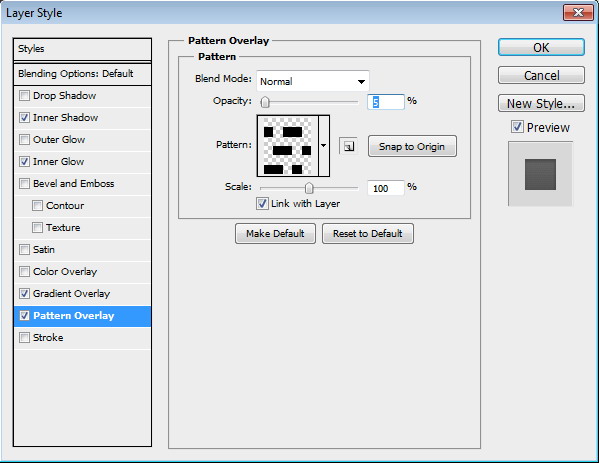 Step 19Draw a rectangle covering top part of previous shape. Set its color to #342b30. Hit Command/Ctrl + T to perform transformation, right click and choose Perspective. Pull top corner until we have a trapezium shape.  Step 20Create new layer and convert it to Clipping Mask (Command/Ctrl + Alt + G). Paint some subtle highlights and shadows. 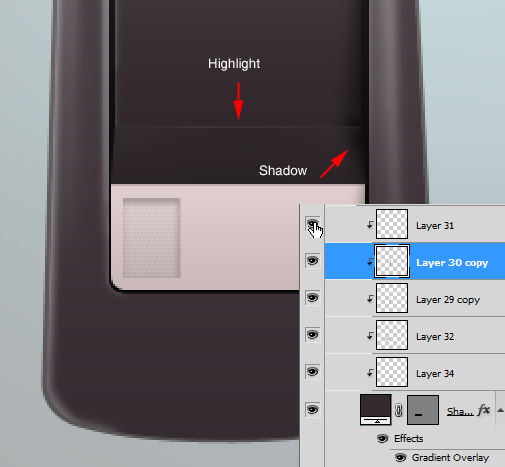 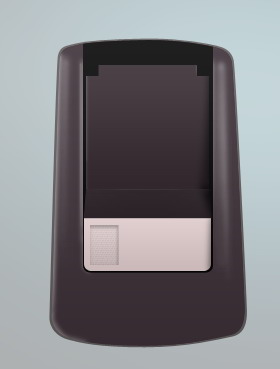 Step 21: ButtonDraw a circle shape with color #706a6a. 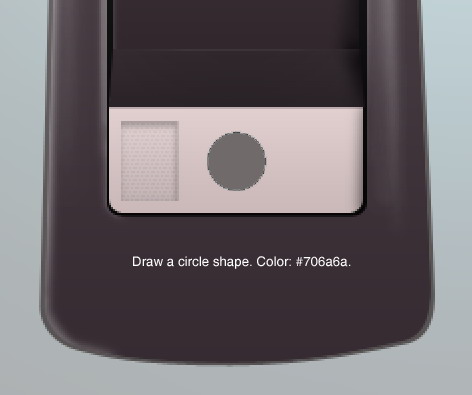 Step 22Duplicate shape we have just created and set its color to #d6c5c5. Resize it to 95%. 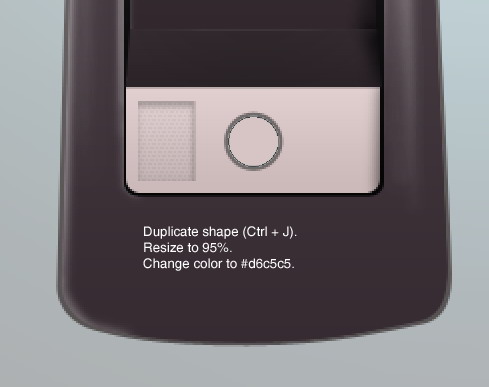 Step 23Again, duplicate the circle shape. Resize it to 95%. Add following Layer Styles. 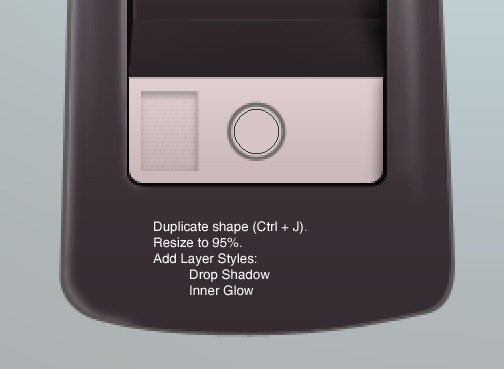   Step 24Duplicate shape. Resize it to 85%. Remove all previous Layer Style. Replace them with these Layer Styles. 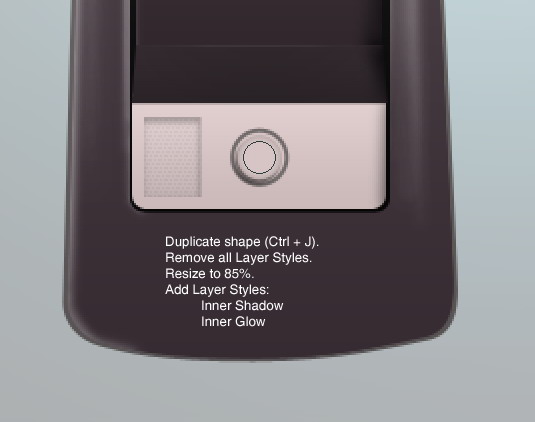  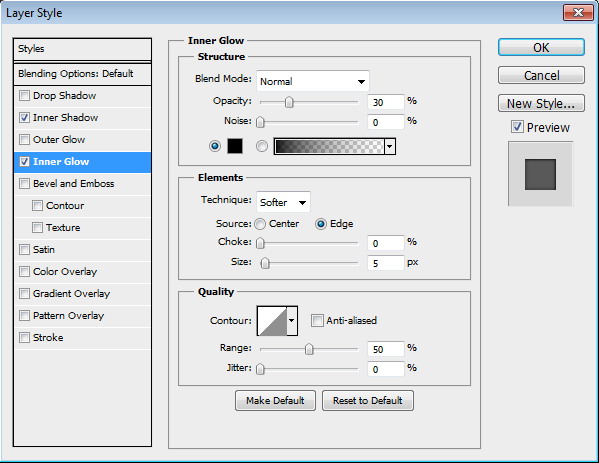  Step 25Duplicate previous shape and then resize it to 95%. Add following Layer Styles. 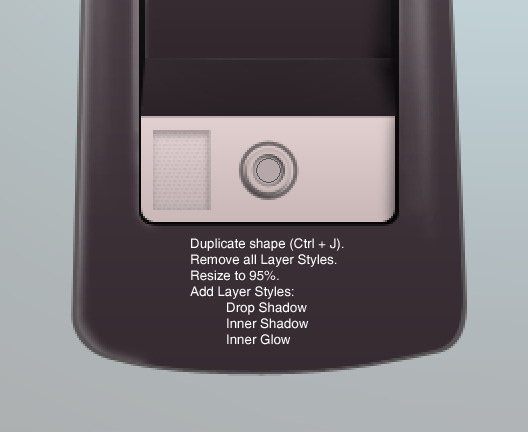 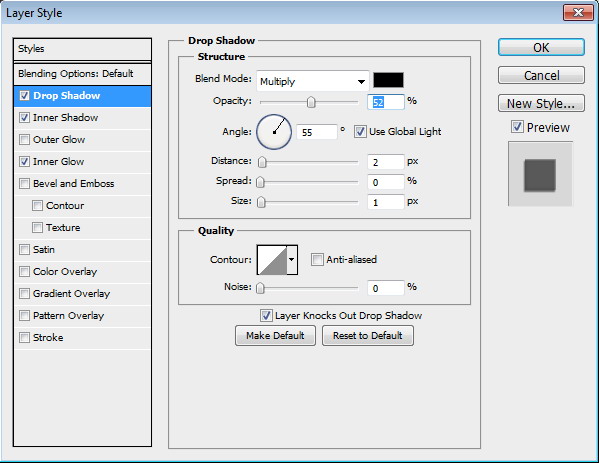 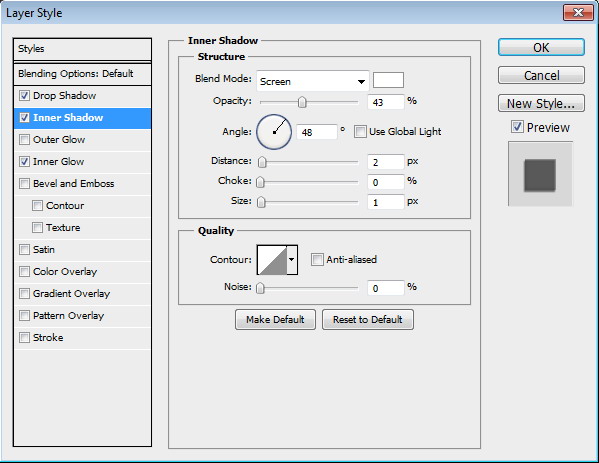  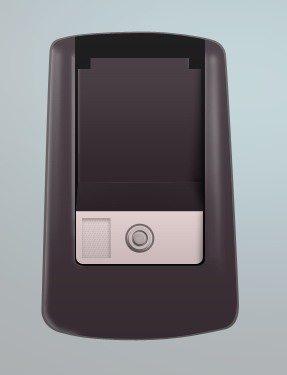 Step 26Put all button layers into a group. Alt-drag group to duplicate the button. 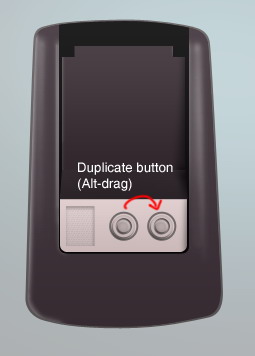 Step 27: HighlightsActivate pencil tool and set its size to 1 px. Draw 1 px white line on some areas. Delete both its ends using big soft brush eraser and reduce layer’s Opacity to 40%. 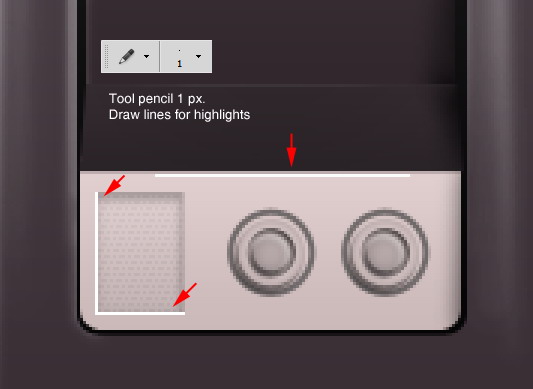 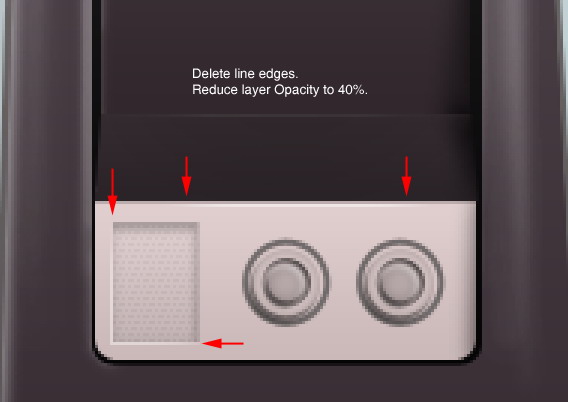 Step 28: Indicator LampDraw a circle with color #706a6a and add Layer Style Drop Shadow. 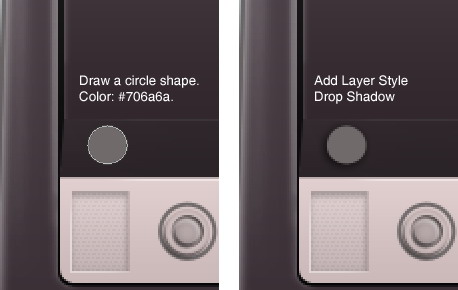 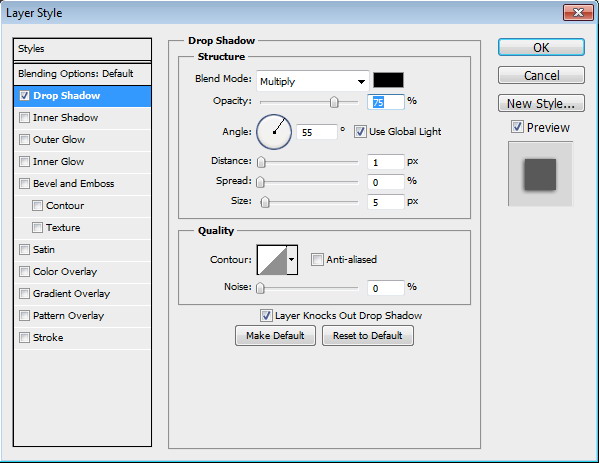 Step 29Duplicate circle shape we have just created and remove its Layer Style. Resize it to 85%. Change its color to #d6c5c5. . 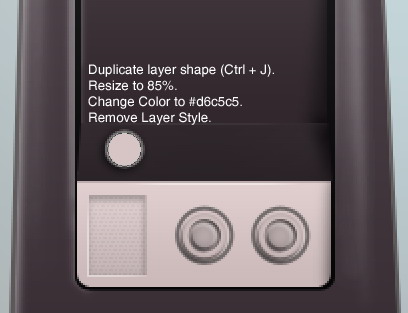 Step 30Duplicate layer shape (Command/Ctrl + J). Resize it to 75%. Add following Layer Styles. 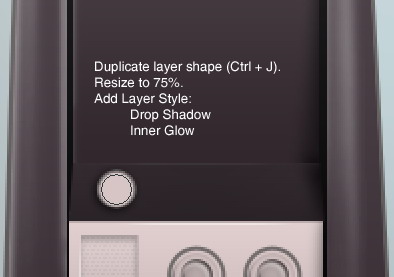 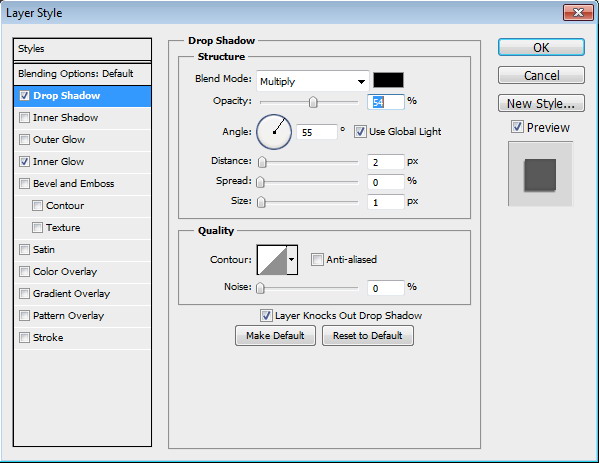  Step 31Draw smaller circle shape with color #ebc358. Add following Layer Styles. 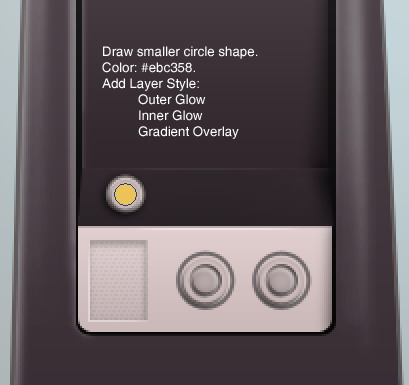 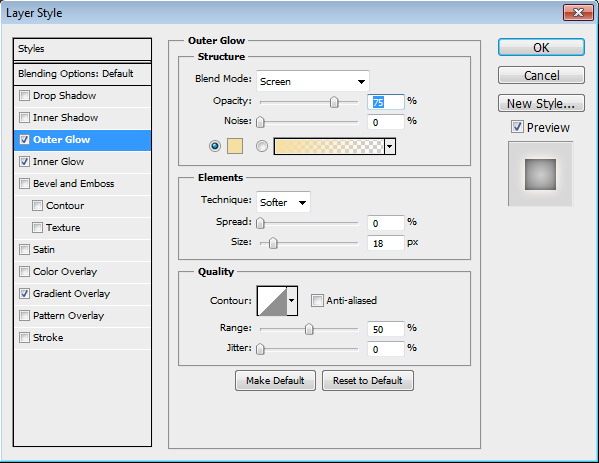  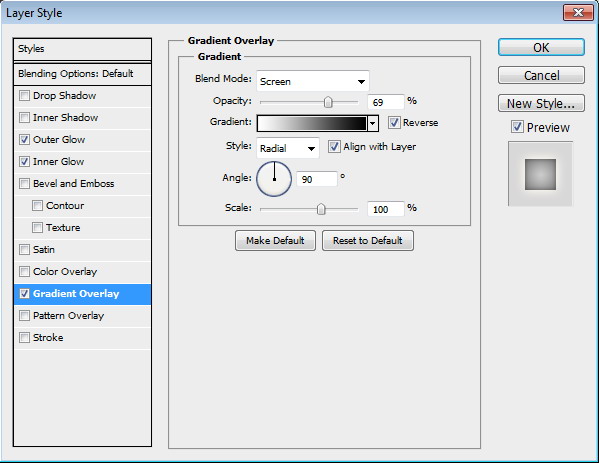 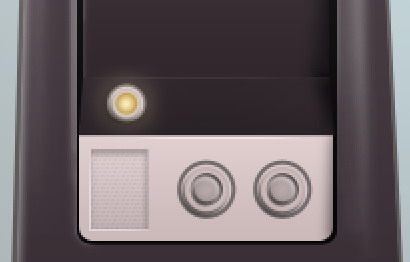 Step 32Set foreground color to #ccb371 then use soft brush to paint lens flare on top of the lamp. Reduce layer Opacity to keep the effect natural. 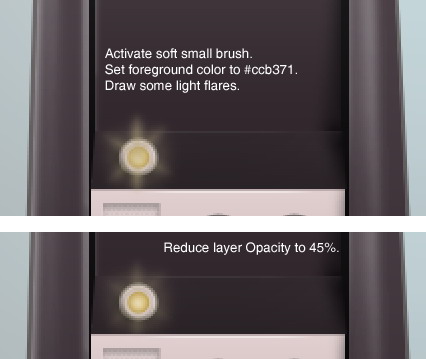 Step 33Place all layers that compose the lamp inside a group by selecting them and hit Command/Ctrl + G. Alt-drag the group to duplicate it. Do this process twice until we have two lamps and make sure to change their color. 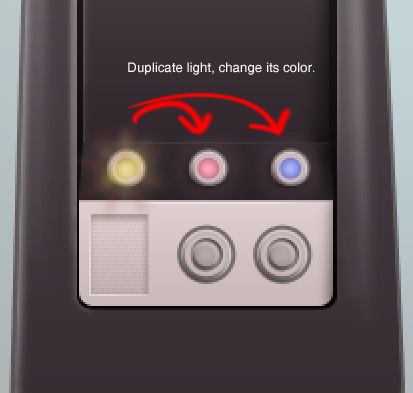 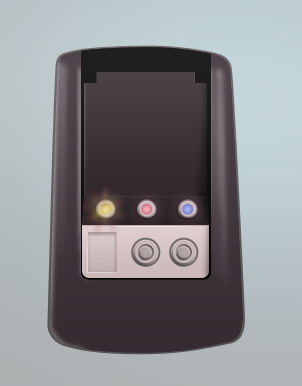 Step 34: OscilloscopeDraw a circle shape with color #efe7e6. Add following Layer Style. 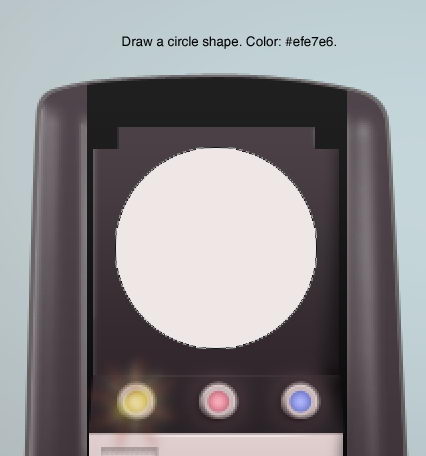  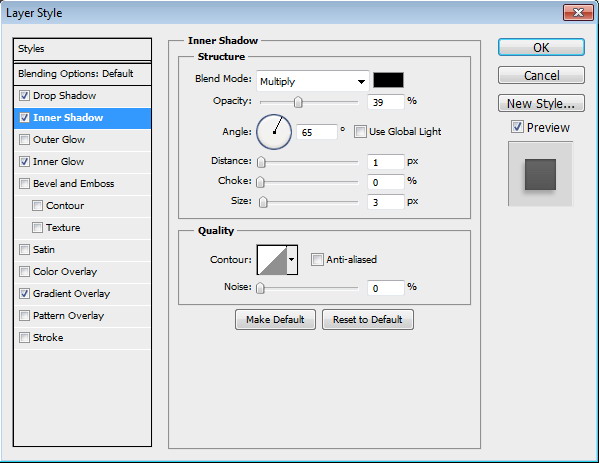   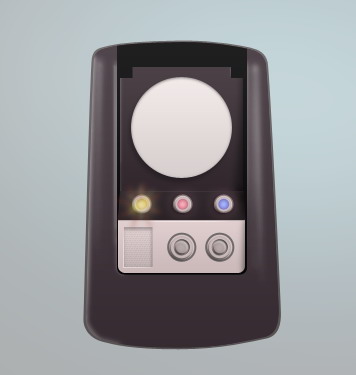 Step 35Duplicate circle shape and resize it to 95%. Add following Layer Styles. 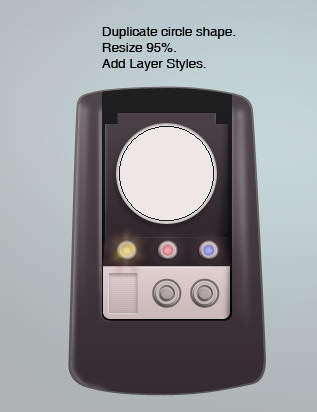  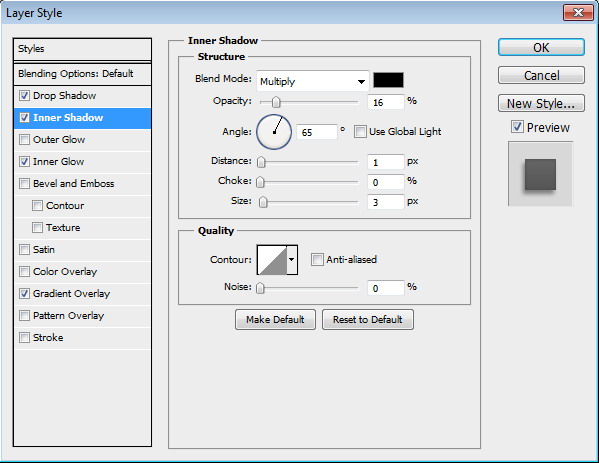 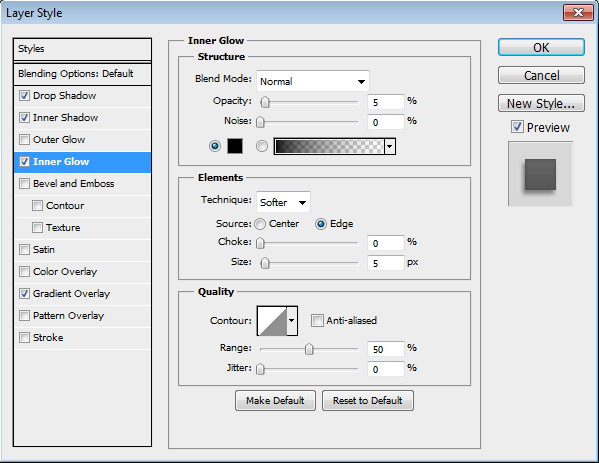  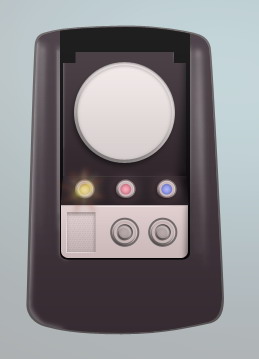 Step 36Duplicate previous circle shape and resize it to 92%. 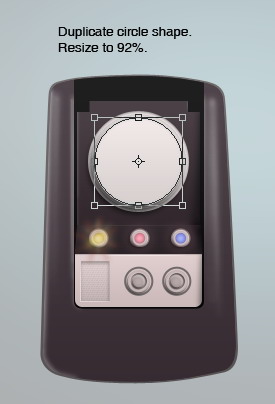 Step 37Duplicate circle shape and resize it to 75%. Change Layer Styles used with following settings. 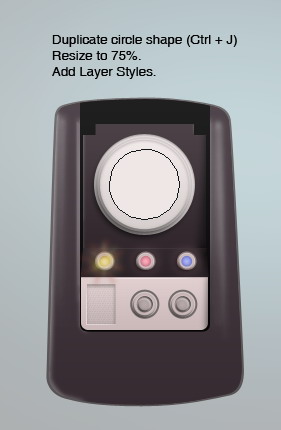  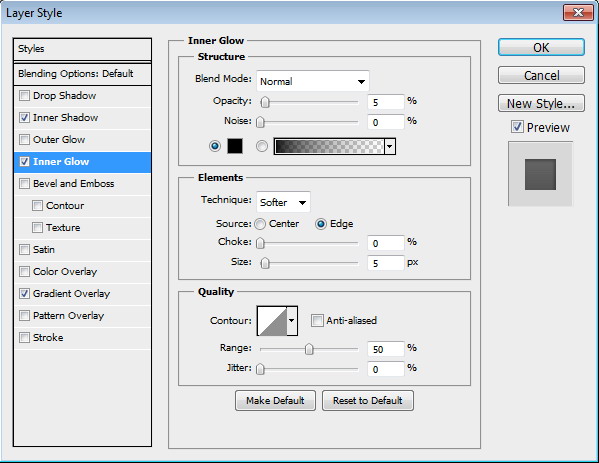  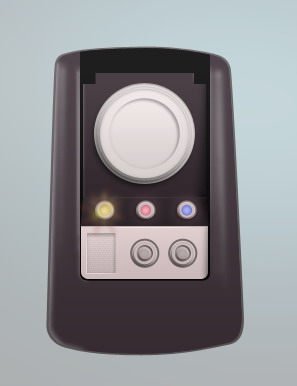 Step 38Draw 1 px line with color #5e4a49. Place it on the middle of the circle. 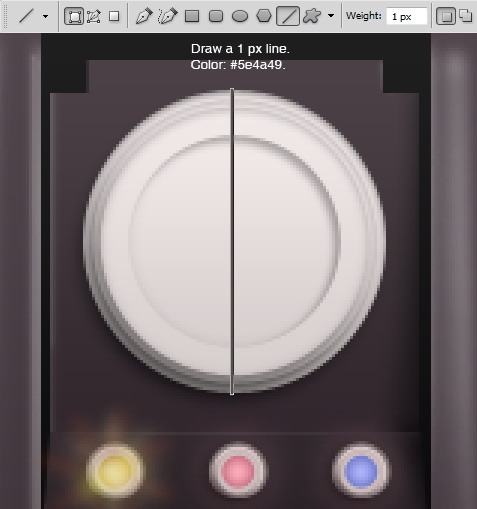 Step 39Activate Path Selection Tool and select the line. Hit Command/Ctrl + Alt + T to duplicate and transform the line path. In the Option Bar insert 5 degree. Repeatedly, hit Command/Ctrl + Shift + Alt + T to repeat the duplication process. 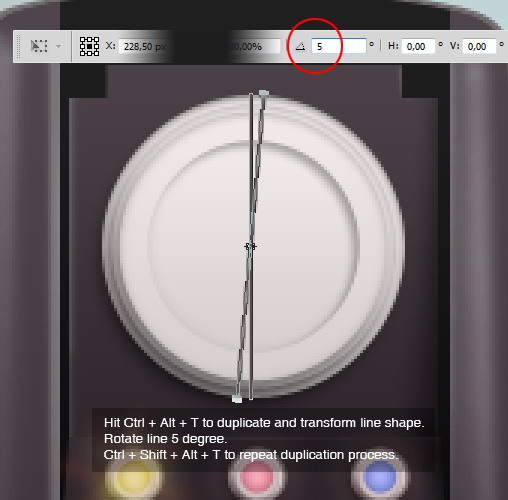 Step 40Repeat this process until the lines form a full circle, 360 degree. 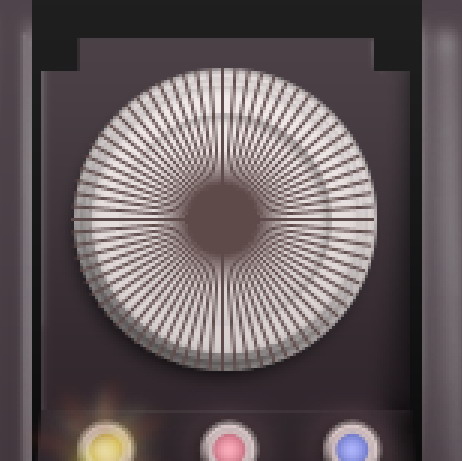 Step 41Command/Ctrl-click last circle that we created in Step 37. Click Add Layer Mask icon. The lines now goes inside the circle. 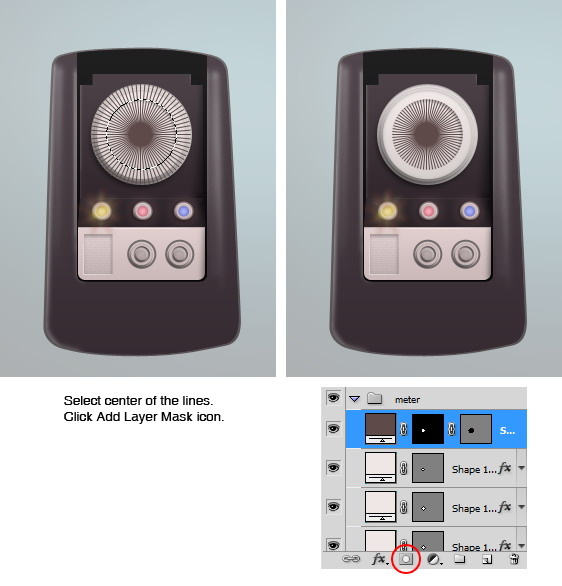 Step 42: CoverDraw a rounded rectangle with color #956a0b. Draw another rounded rectangle inside it and set its mode to Subtract. 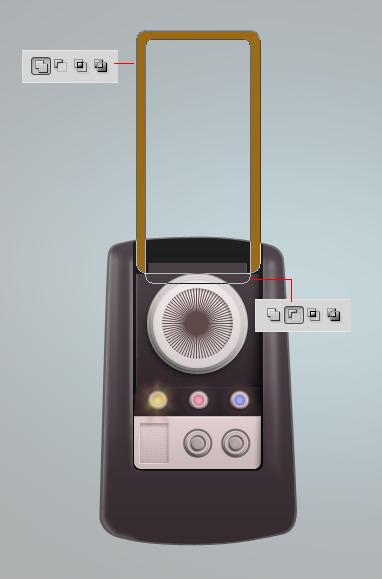 Step 43Add layer mask and paint its lower part with black to fade it into the communicator base. Add following Layer Styles. 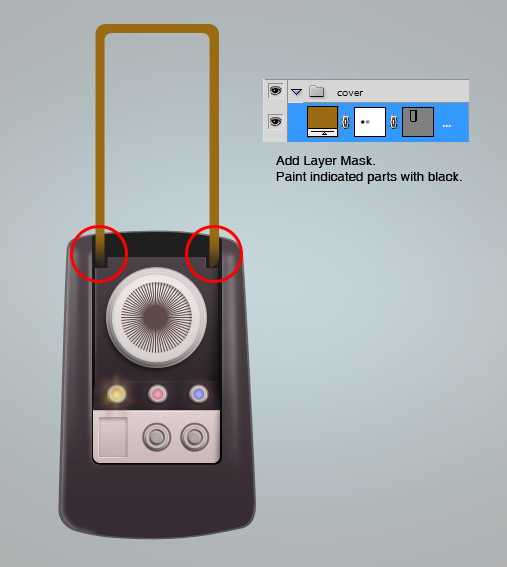 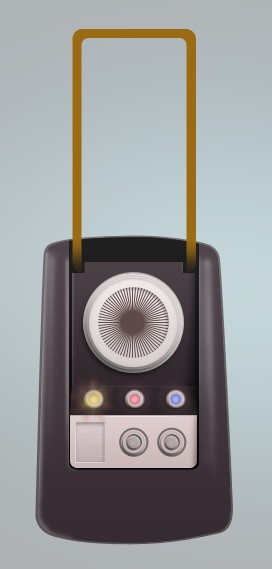 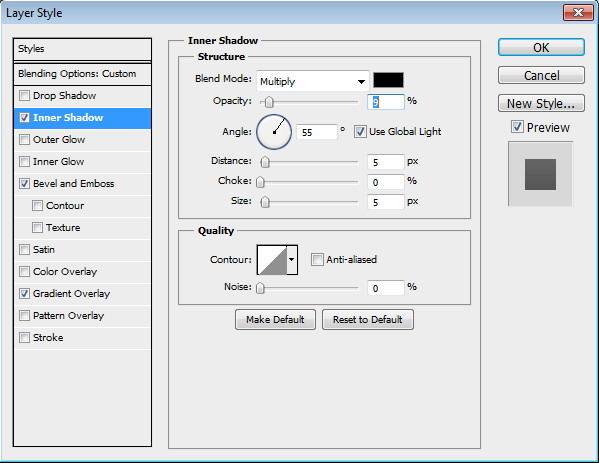 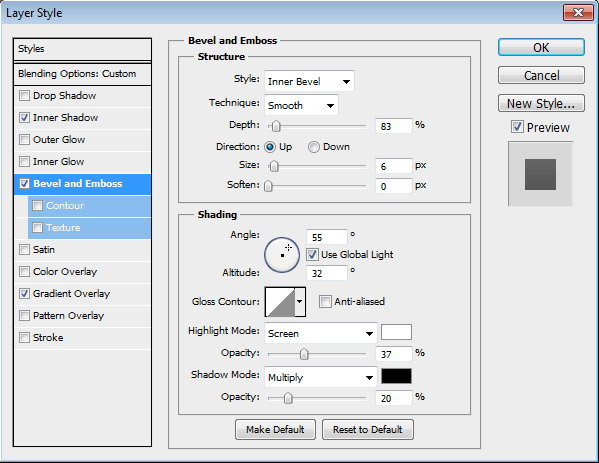  Step 44Draw a rounded rectangle behind previous shape. Set its color to #b79556. Add following Layer Styles. 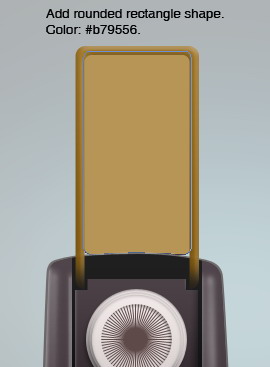 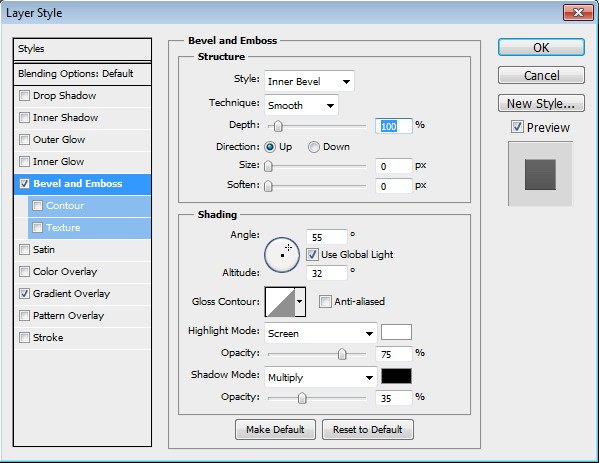  Step 45Add circle shape onto the path. Set its mode to Subtract to create a hole inside the shape. 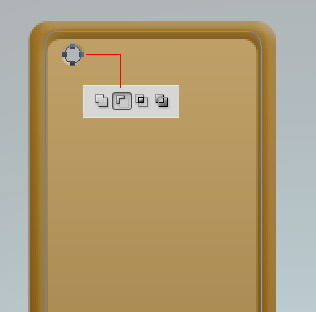 Step 46Select the circle. Transform and duplicate the path by pressing Command/Ctrl + Alt + T. Move the duplicated circle to the right. Repeatedly press Command/Ctrl + Shift + Alt + T to repeat the duplication process until we have a row full of holes. Draw more circles on the second row.  Step 47Select all the circles. Hit Command/Ctrl + Alt + T to transform and duplicate them. Press down arrow a few times.  Step 48Hit Command/Ctrl + Shift + Alt + D repeatedly until the shape is fully covered with holes.   Step 49Create new layer and set it as Clipping Mask by pressing Command/Ctrl + Alt + G. Draw some shadows on the cover to keep it realistic.  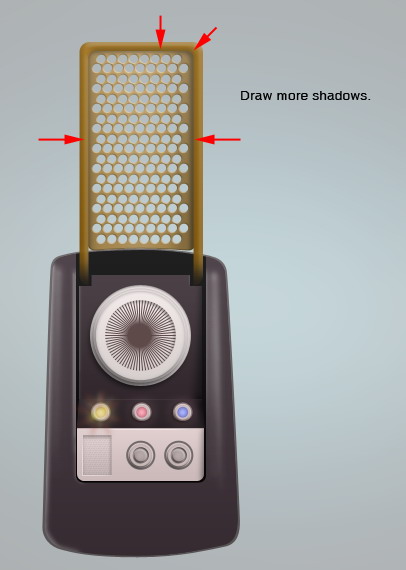 Step 50Duplicate communicator’s basic shape and change its color to #493c45. Add a rounded rectangle on top and set its mode to Intersect. Add Layer Style Gradient Overlay. 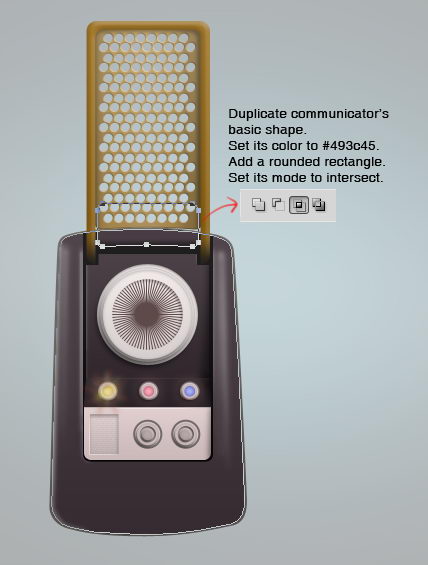  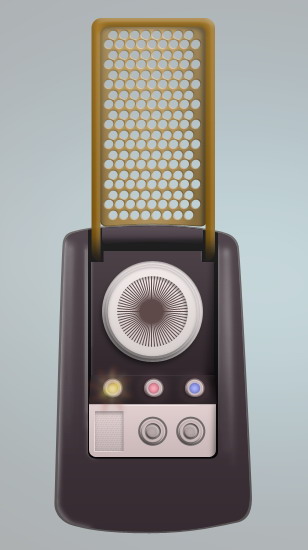 Step 51Zoom closer onto the shape to see the details closer. Activate brush tool and select small soft brush with hardness 0%. Create new layer. Draw subtle highlights on top of the shape. 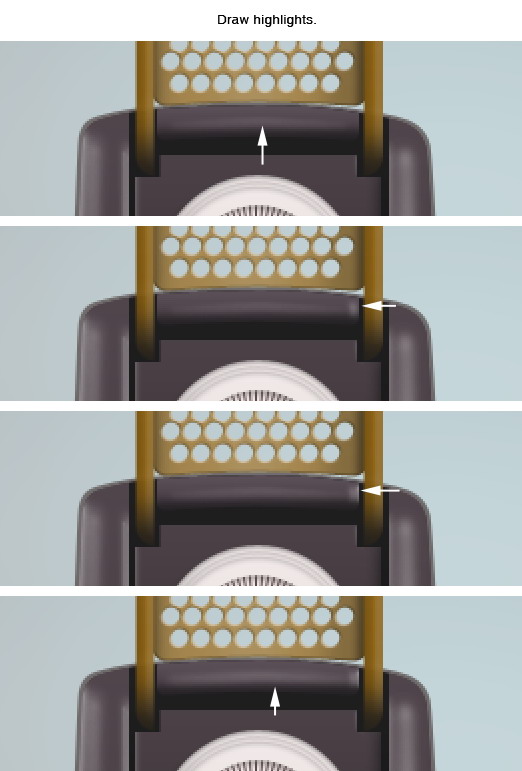 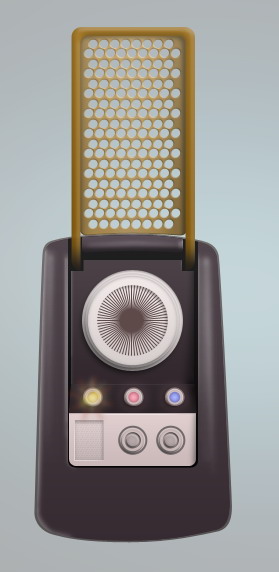 Step 52: Tweak Highlights and ShadowsCommand/Ctrl-click communicator basic shape to make a selection based on its shape. Select big soft brush and then paint black on lower part of the communicator. This way, the communicator appearance is not so flat. 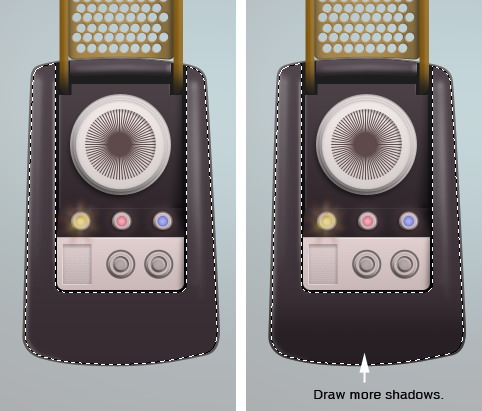 Step 53Zoom closer to see details. Select soft small brush. Paint white on some parts for its highlights.  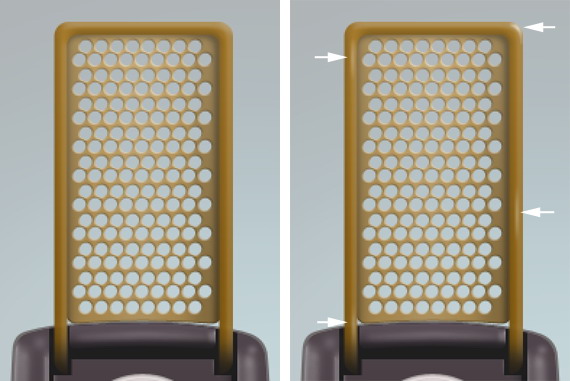 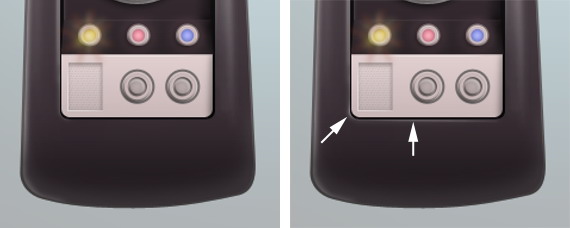 Step 54Once again, Command/Ctrl-click basic shape of the communicator. Paint more shadows on some parts below to make it darker and glossy. 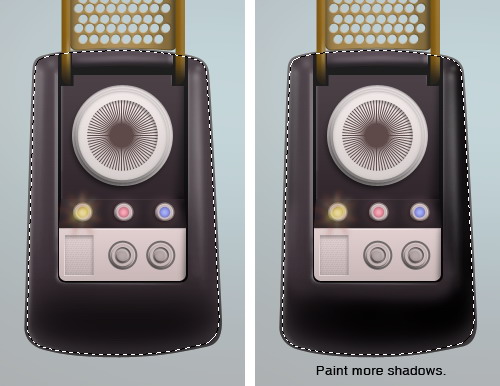 Step 55: ShadowDraw elliptical selection under the communicator and fill it with black. 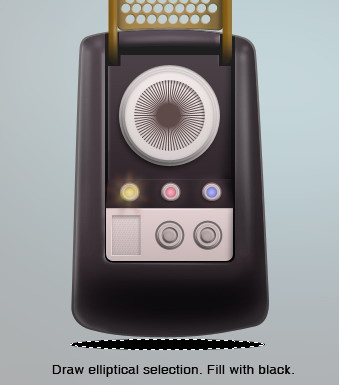 Step 56Remove selection by pressing Command/Ctrl + D. Click Filter > Blur > Gaussian Blur to soften the shadow. 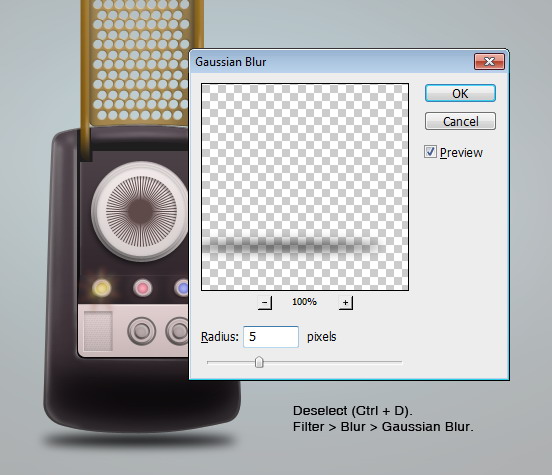 Step 57Duplicate shadow layer we have just created. Apply another Gaussian Blur by pressing Command/Ctrl + Alt + F but this time use bigger radius. 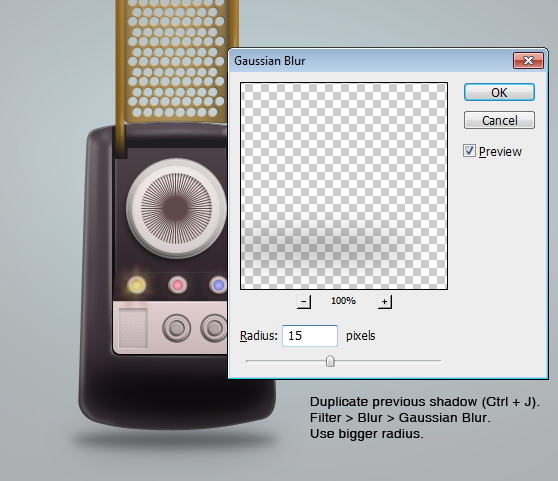 Step 58Here’s the result. 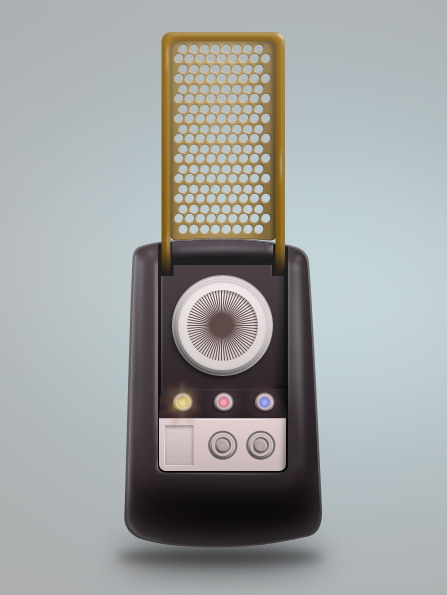 Final ImageFinally, we have finished drawing this cool communicator. I also added some text using the font Final Frontier. I hope you enjoy this tutorial as much as I do. Live long and prosper. 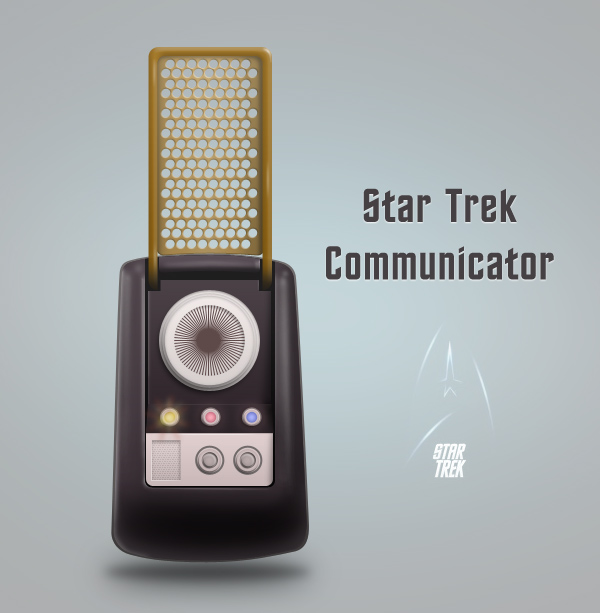 Тэги: design, icon
Главная / Главные темы / Тэг «iconia»
|
Категория «Книги»
Взлеты Топ 5
Падения Топ 5
Популярные за сутки
|


Загрузка...